How to Embed IP Camera Video into a Web Page using Vivotek Network Cameras
Home > CCTV Security Camera & Video Surveillance System Forums > IP Camera Support > Vivotek IP Camera Support > How to Embed IP Camera Video into a Web Page using Vivotek Network Cameras
- This topic is empty.
-
AuthorPosts
-
October 31, 2011 at 3:33 pm #31325November 21, 2011 at 9:09 pm #32271
 Mike HaldasKeymaster
The sample HTML page to embed an IP camera into a web page was updated today so that Internet Explorer is supported using the Active X control. Firefox, Chrome, and Safari web browsers work using the cameras MJPEG (motion jpeg) video stream.
March 8, 2012 at 2:48 pm #32272AnonymousInactiveThis is an excellent and very helpful post. Much appreciated and found to work well with our SD7151 PTZ camera; up and running in minutes.
That said, we have been unable to apply this to our IP8332 MP camera; nothing I have done will get the image to come up, it appears I am missing something either with the camera or in the code snippet.
Anyone get this working with a vivotek MP camera?
Thanks!
-Mark
January 3, 2013 at 1:31 pm #32273AnonymousInactiveHello.
Thanks for the tutorial. I am using the script to embed Ip camera video but only runs in Firefox and Internet Explorer. In Opera doesn't work fine and Chrome and Safari don't show any image.
Can you help me to solve the problem? Any idea?
Regards.
January 3, 2013 at 1:49 pm #32274AnonymousInactiveAnd other question. How can I put the user and password directly in the script?
Thanks.
January 5, 2013 at 1:44 pm #32275AnonymousInactiveSolved. In Safari and Chrome It works. The problem was the authentication. If the auth is enabled, page don't loads.
It would be good to put directly user and password in the script…
In Opera the load is wrong.
Regards.
February 9, 2013 at 2:56 am #32276AnonymousInactiveMy ip cam support only 10 viewers at a time to watch it. If I embed it, will I able to let more viewers watch my cam? If yes then how many?
March 19, 2013 at 5:01 am #32277AnonymousInactiveThis is excellent post, Thanks for that nice post its really helpful regarding my some issues.
As its quite use for me as i use Firefox for that.
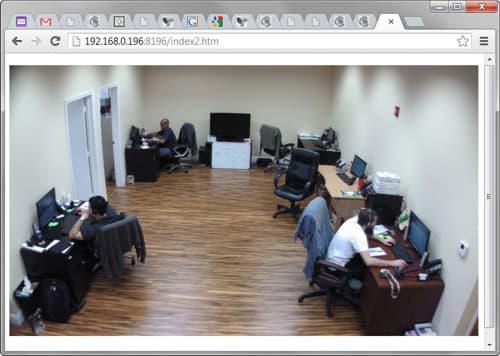
March 24, 2013 at 3:12 pm #32278Mike HaldasKeymasterZavio IP cameras are another great choice to embed the video feed into a web page.
This is a screenshot of a Zavio F7210 2 Mepgixel IP camera embedded in a web page and being viewed on from a Mac computer in the Firefox web browser.
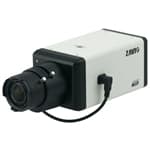
Here is the Zavio F7210 camera used for the video embed.
Instructions for how to embed Zavio cameras into a web site can be found here.
https://www.cctvcamerapros.com/Embed-IP-Camera-in-Web-Page-s/657.htm
-
AuthorPosts
- You must be logged in to reply to this topic.