
Raspberry Pi Twitter Project: Push Button, Camera Capture, Tweet Photo
In this project, I program my Raspberry Pi (using Python) to take a picture using a Pi camera, then share the photo via Twitter when a button is pressed. I use the Twython python library to integrate with the Twitter API. I realize that I am not the first person to document a Twitter project like this, but I chose to share my own version for a few reasons.
1) I kept getting the following warning from the Twython library when using the update_status_with_media() method.
“TwythonDeprecationWarning: This method is deprecated. You should use Twython.upload_media instead.”
All of the projects that I found online used that deprecated method to tweet a photo. After a bit of research, I found the new method of photo sharing via the Twitter API requires that you make two API calls. One to upload the media file and the second to tweet using the reference the ID of the media file. The Python code for this project gets rid of that warning.
2) I really like to use the GPIO ports on Raspberry Pi when I can. Â I have been designing and developing software for many years but I am still a noob when it comes to electrical circuitry design. So, I wanted to use a push button to trigger the tweet and use LEDs to report the status of the process. Not the most intricate of wiring projects, but every bit of experience helps.
3) I tested this entire process on a brand new install of the Raspbian os for Raspberry Pi. I wanted to provide step by step instructions using a fresh install so that I can document any library dependency that I may run into.
Project Setup Steps
Follow these steps to configure and program your Raspberry Pi to take a photo and share it via Twitter when you push a button.
- Add Mobile Number to Twitter
- Setup Twitter App
- Install Pi Camera
- Install Python Libraries
- Install Program Code
- Wire Raspberry Pi
- Run the Code / Press the Button
Add Mobile Phone Number to Twitter
To interface with the Twitter API / SDK, you must setup a Twitter app that has both read and write access to your timeline. In order to do this, you must have a Twitter account with a verified mobile phone number associated with it. After you create the app, you can remove your mobile number. I assume that you already have a Twitter account, but if you do not, please create on here.
- Login to your Twitter account.
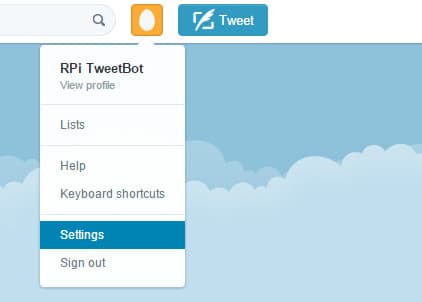
- Click on your Twitter icon in the upper left and select Settings.
- After you are logged in, click on the Mobile link on the left.
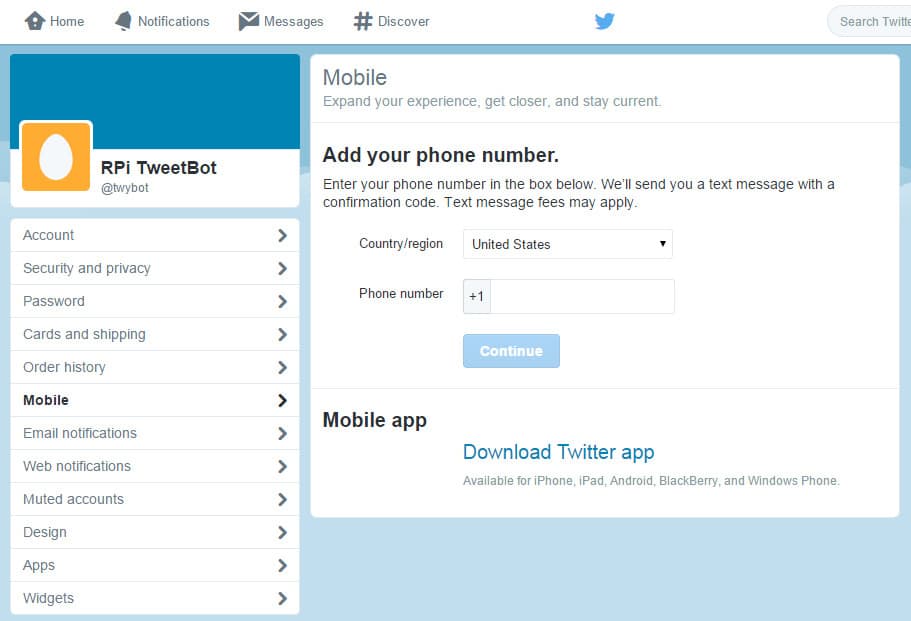
- Add your mobile phone number and click Continue.
- A verification code will be send to you. Enter that code on the confirmation screen.
Setup Twitter App
- From the same web browser where you are logged  into your twitter account, go to https://apps.twitter.com/
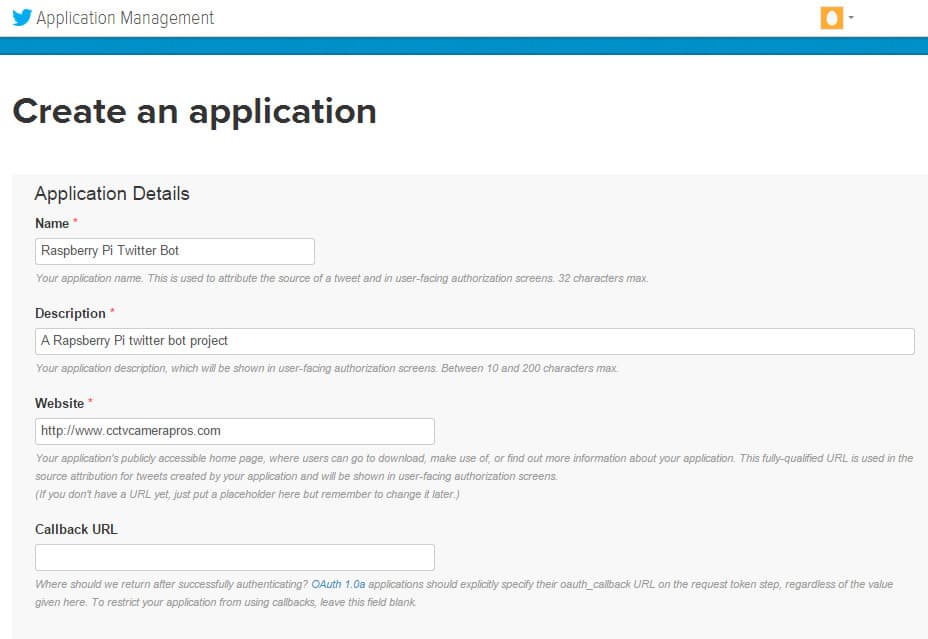
- Click on Create New App.
- Fill in Name, Description, and Website. Agree to T&Cs. Click Create your Twitter application button. Do not worry if you don’t have a website for the project, just fill this in with any valid web address. Be sure to include the “https://”.
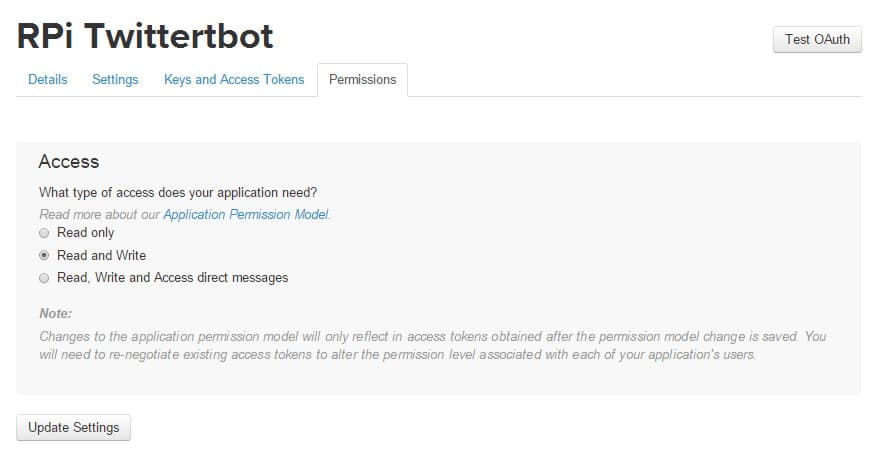
- Click on Permissions Tab. Select Read and Write. Press Update settings.
- Click on the Keys and Access Tokens tab, then click on the Create my access token button.
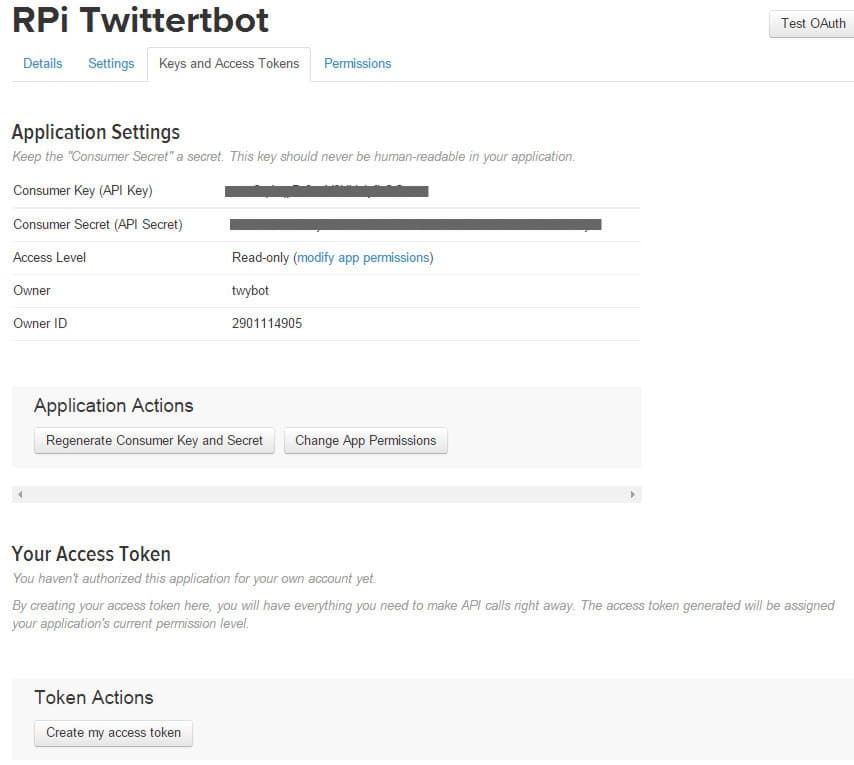
- After you press the Create my access token button, you will see the Access Token and Access Token Secret fields. Keep all of these field values handy. You will need them for the Python code.
Consumer Key (API Key)
Consumer Secret (API Secret)
Access Token
Access Token Secret
Install Pi Camera
If you do not already have a Pi camera connected to your Raspberry Pi board and enabled, please follow the instructions here to get that done. If you prefer to use a USB web cam, you can find instructions to set that up here. If you are a noob, I recommend using a native Pi camera because my project code is already setup to use one.
Install Python Libraries
Use the below commands to install the required Python libraries. The only one required for this project is twython.
In case you do not already have pip installed, I included commands to install that first. Remember, I am testing this from a fresh Raspbian build. If you already use pip to install Python libraries, you can skip steps 1 and 2.
- sudo apt-get update
- sudo apt-get install python-pip
- sudo pip install twython
Install Program Code
Here is the source code for the project. The comments explain what is going on.
You can download the source code here if you do not want to use wget to retrieve it.
- I recommend creating a new directory for any project. You can use this command to create a new directory.
mkdir tweet - Change into that directory using this command.
cd tweet - You can use the following command on your Raspberry Pi to retrieve the source code for this project. It will be placed in the tweet directory as long you are there when you run it.
wget https://videos.cctvcamerapros.com/downloads/python/rpi-tweet-pic.py - Edit the rpi-tweet-pic.py using your favorite text editor. I use vi.
- Look for the variables: apiKey, apiSecret, accessToken, and accessTokenSecret and enter the values from the Twitter app that you created.
- By default, I have the image size set to 1280 x 720. You can adjust this by editting the IMG_WIDTH and IMG_HEIGHT variables.
Wire Raspberry Pi
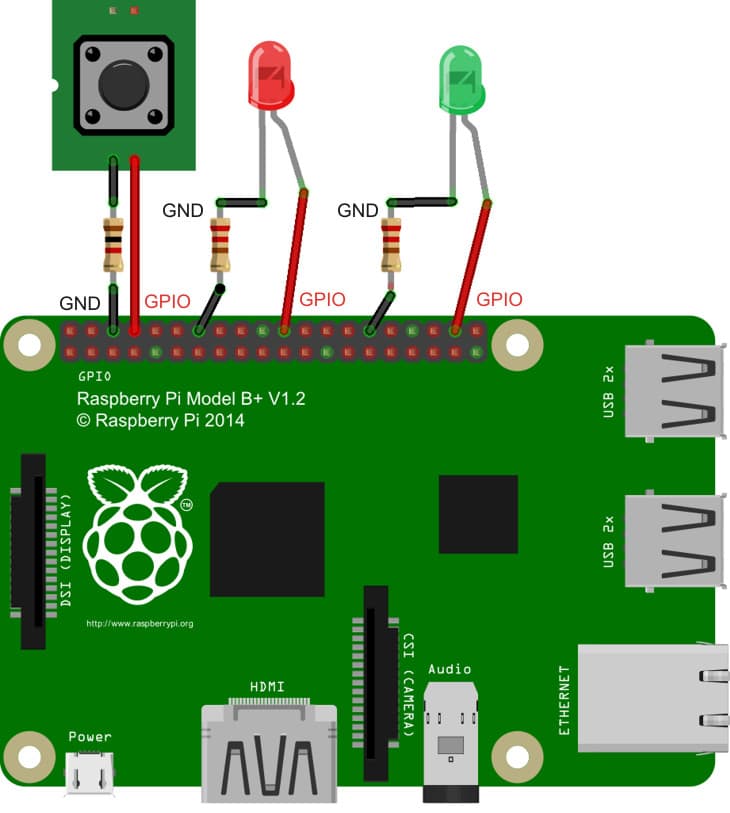
Here is how I wired the push button and LEDs to my Raspberry Pi board. Pushing the button is the action that initiates the camera taking a photo, then uploading and sharing the photo via Twitter. The green LED is used to indicate that the system is ready and you can press the button. The red LED indicates that the program is running. I am using resistors with the LEDs and button.
Disclosure: Though I aspire to be one day, I am not an electronics expert at this time. I am much stronger at software system design and development. If you see anything wrong with the way I have wired my board, that will not surprise me. Â If you have any suggestions for improvement, please let me know. I used resistor sizes that I saw being used in other projects using similar hardware.
Also please note that the image below does not reflect the actual GPIO ports that I used in my project code. I use these ports on the diagram because they were spaced out to make it easier to see. You can use any three GPIO ports that  you choose, but please note that if you do not use the ones that I did, you need to modify the following variables in the code.
BUTTON = 12
SYSTEM_READY = 26 # indicates that program is ready to be run
SYSTEM_RUNNING = 13 # indicates that program is running
Run the Code / Press the Button
It’s time to start the program and push the button to test it out. Here is a terminal session that shows how to do that.

- Run this command:
sudo python rpi-tweet-pic.py - The program will start. When it is ready, the following message will appear and the green LED light will turn on.
System Ready- push button to take picture and tweet. - When you push the button, the green LED light turns off and the red one turns on which indicates that the program is running.
- The program prints out a status at each stage.
- When it is complete the following message is displayed, the red LED turns off and the green LED turns back on.
Done – System ready again.
This is what it looks like on Twitter.
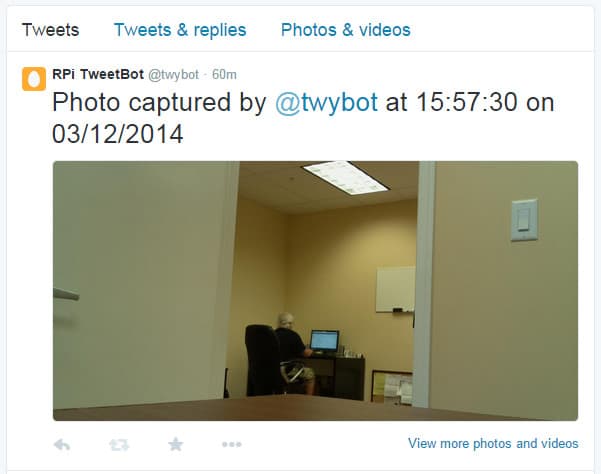
Not the most exciting tweet. That is the view from my office. My Raspberry Pi and camera are sitting on my desk. That is my brother out there hard at work.


