How to Attach a Crimp-on F Connector to RG59 Coaxial Cable
 Using a crimp-on style F connector with BNC screw on connector is a popular method or preparing RG59 coax cable for CCTV system installations. Almost all CCTV cameras and DVRs use BNC connections and RG59 coaxial is the most popular cable solution for CCTV.
Why use F connectors to attach BNC connectors?
At first, it may not make sense to use two connectors to attach a BNC connector. Here are some reasons why professional and DIY installers use this method.
- Many low voltage / cable installers are already trained and comfortable attaching crimp-on F connectors to coax cable.
- Crimp-on style F connectors are much easier to attach when compared to other solutions, such as BNC compression fittings.
- Because of the way the coax core is exposed on F connectors, there is no guessing if you have enough cable stripped before you crimp. Some other type of connectors are not as simple to judge (such as BNC compression connectors) because the core is concealed when you attach the connector to the cable.
Here is how to attach F connectors to RG59
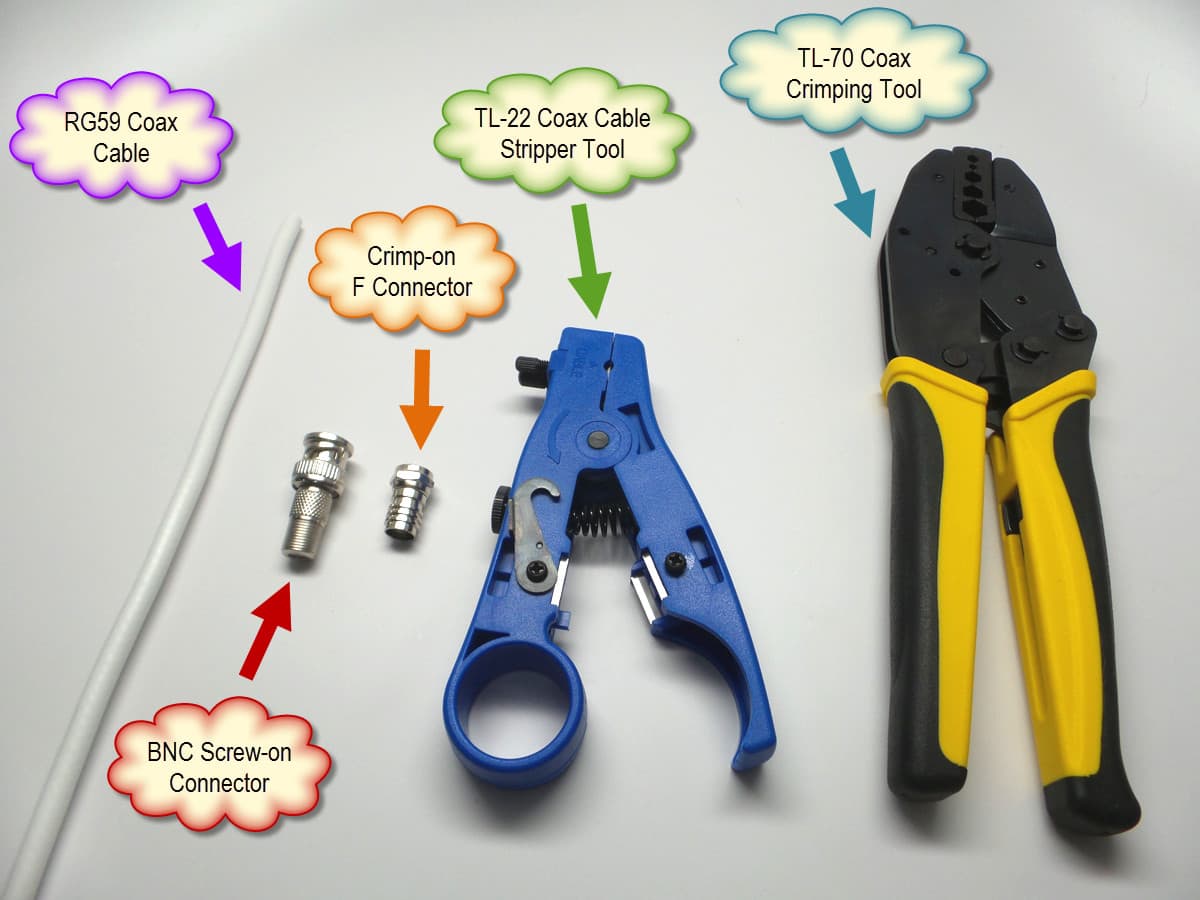
Follow these instructions and images to learn more to attach an F connector to RG59 cable. You can also watch a video tutorial at the bottom of this article. The above image shows the cable, connectors, and tools that will be used.
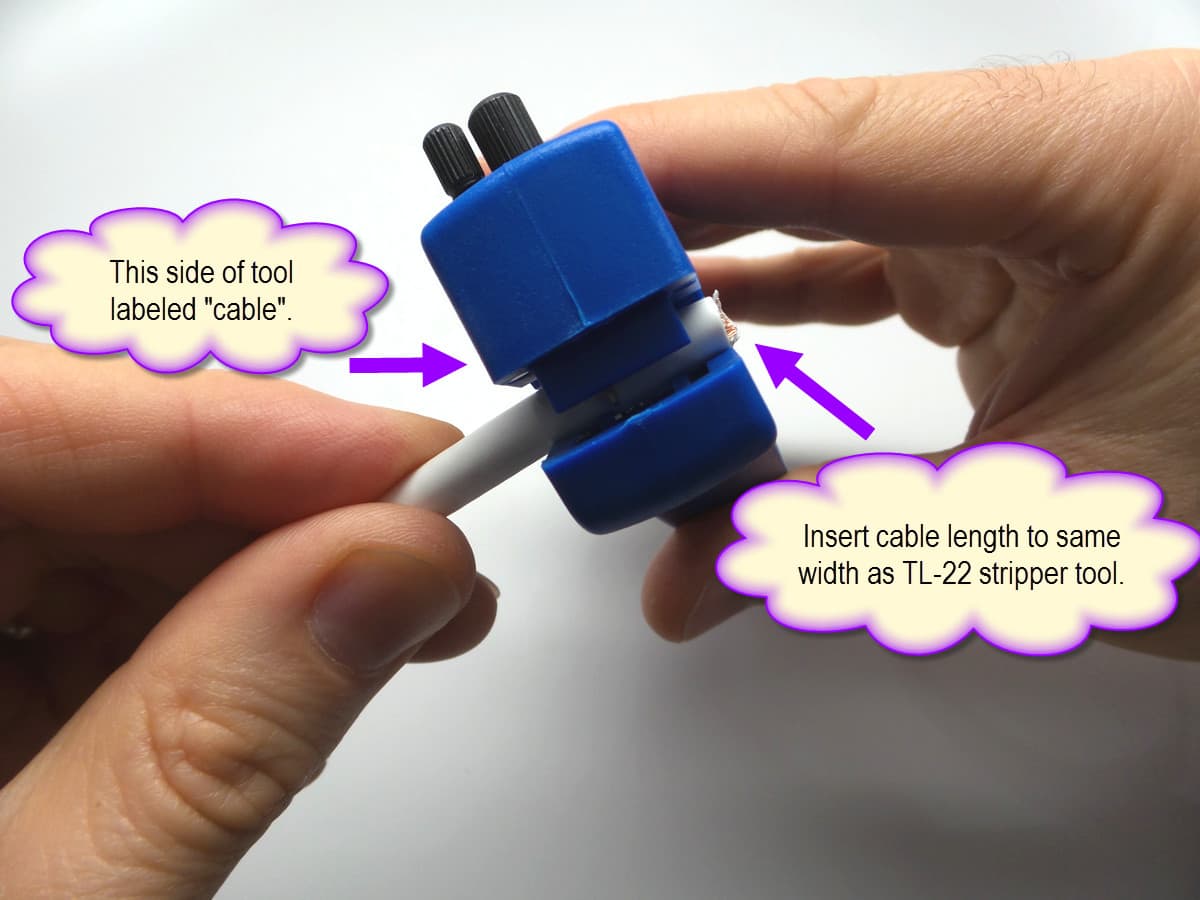
Using a TL-22 cable stripper, insert your RG59 cable through the side labeled “cable”. The end of the cable should be even with the other side of the tool. There is a built-in spring built into the TL-22 that makes the tool clamp down on the cable at just the right pressure. The cutting blades of the TL-22 are adjusted at the factory at the correct height for the two cuts that need to be made. Rotate the tool twice around the cable to make the cuts.
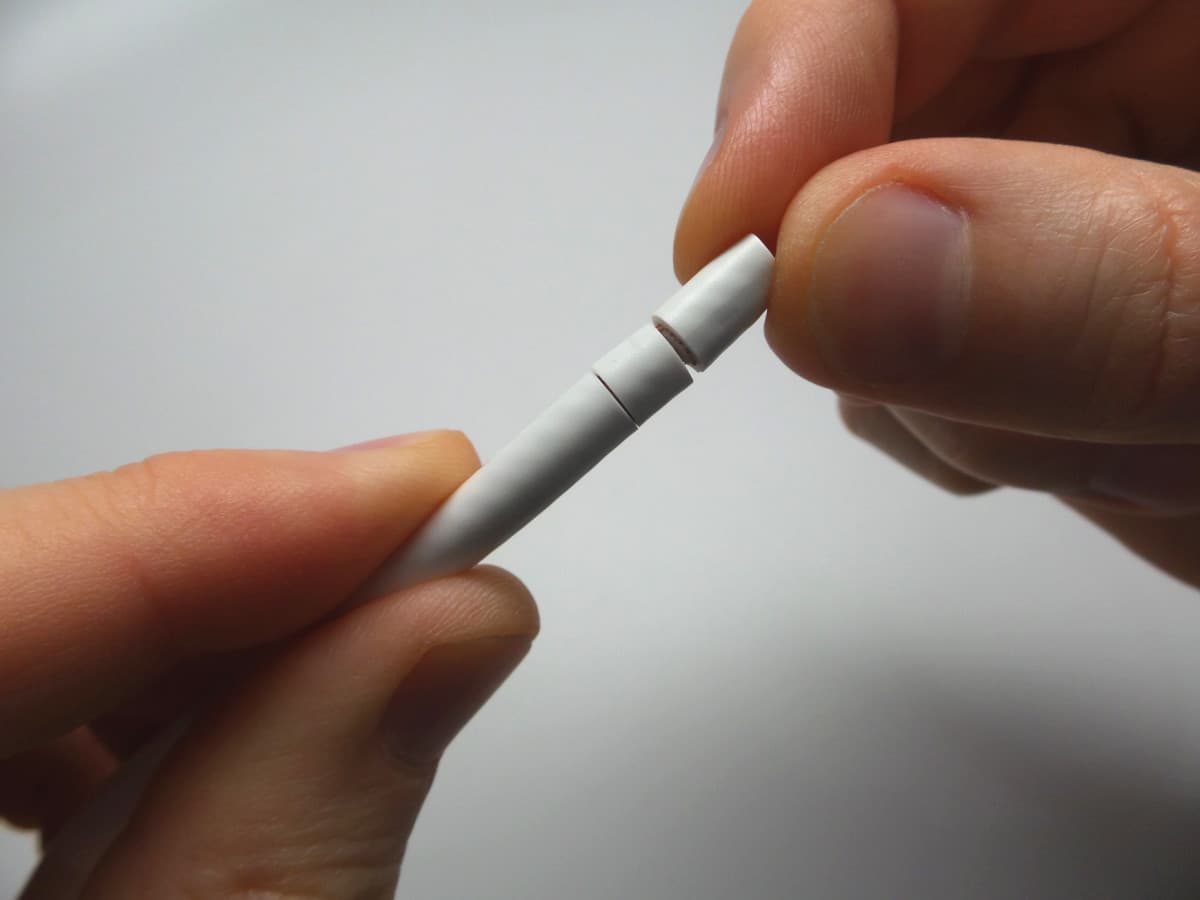 When you remove the tool, you will see the two cuts in your coax cable. One will be deeper than the other.
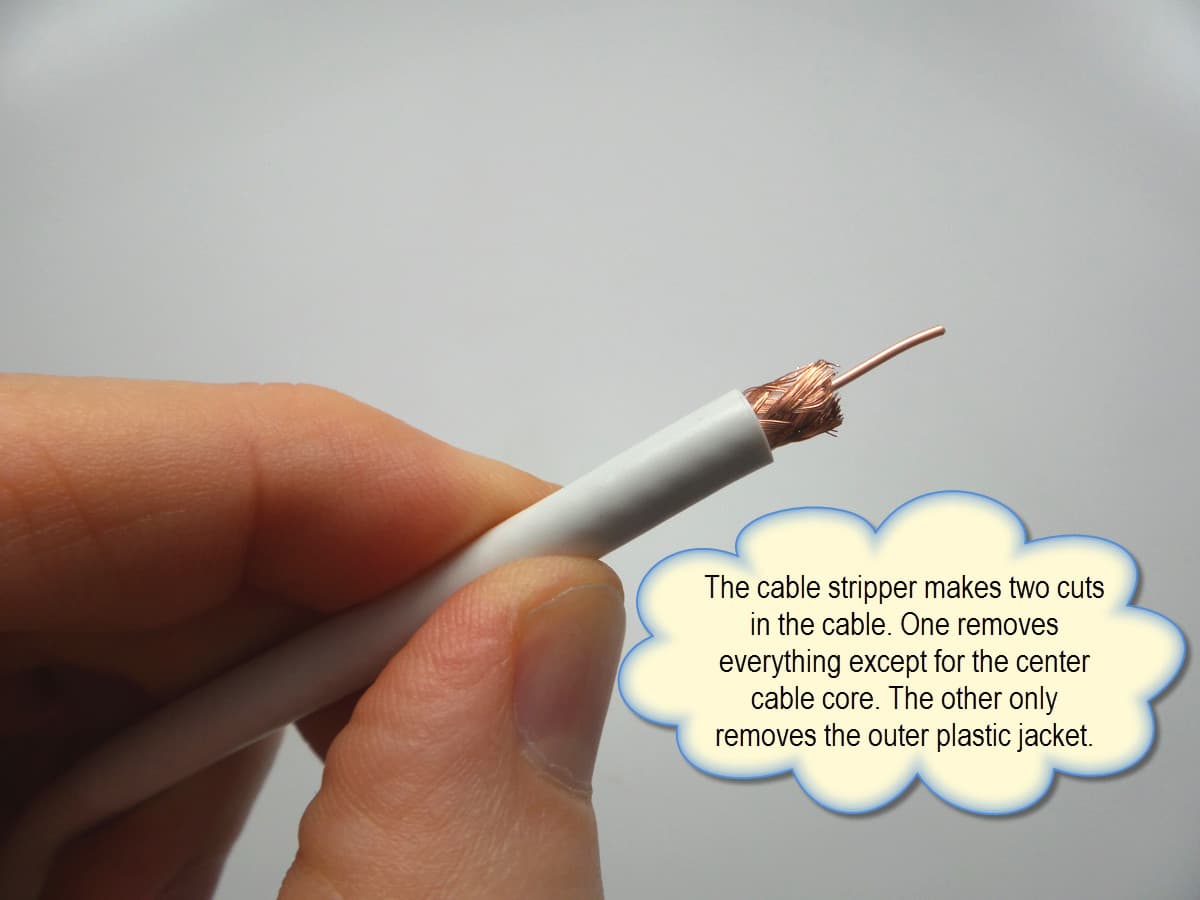
The cable stripper makes two cuts in the cable. One removes everything except for the center cable core. The other only removes the outer plastic jacket.

Peel back the copper shielding. Make sure that none is left touching the center core or dielectric insulator.
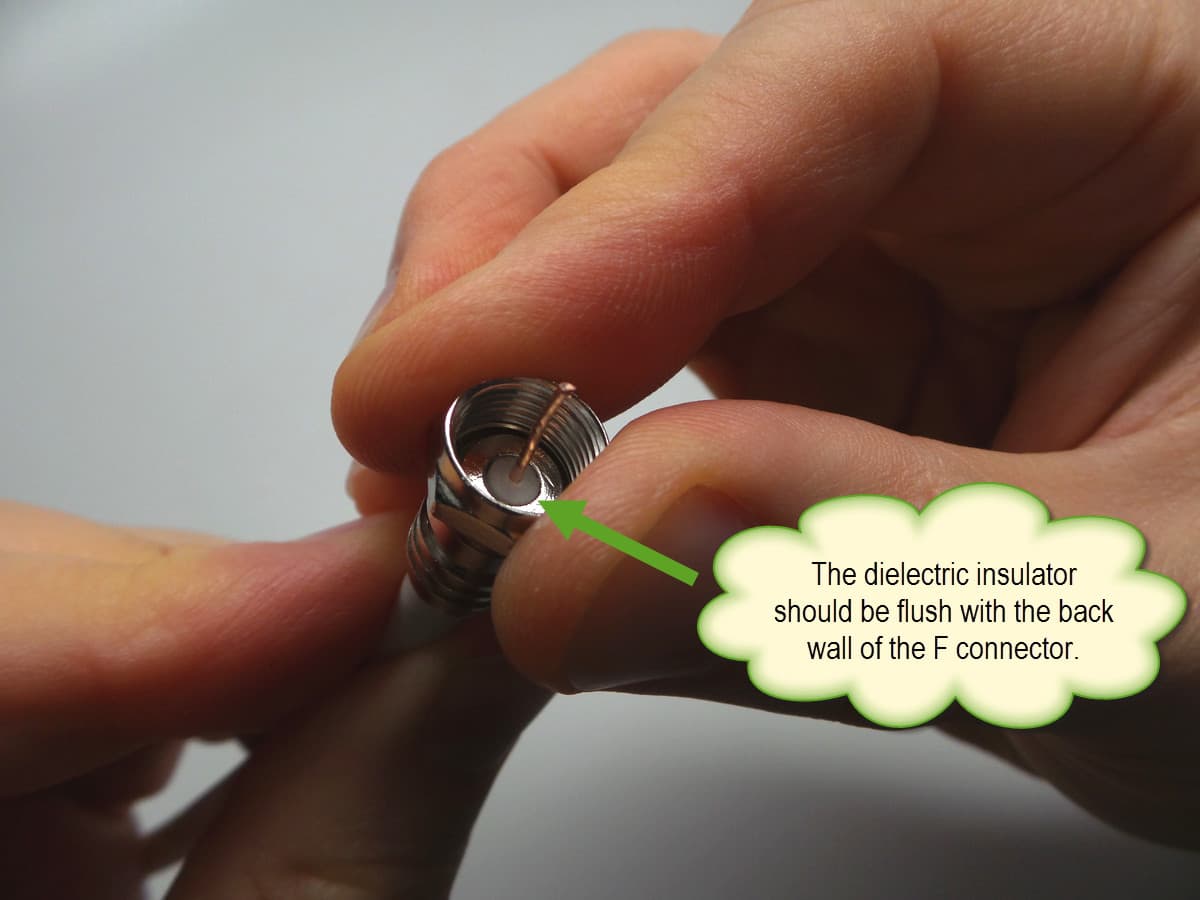
Push the crimp-on F connector firmly onto the coax cable. This will require quite a bit of pressure and some twisting. The dielectric insulator should be flush with the inside wall of the F connector.
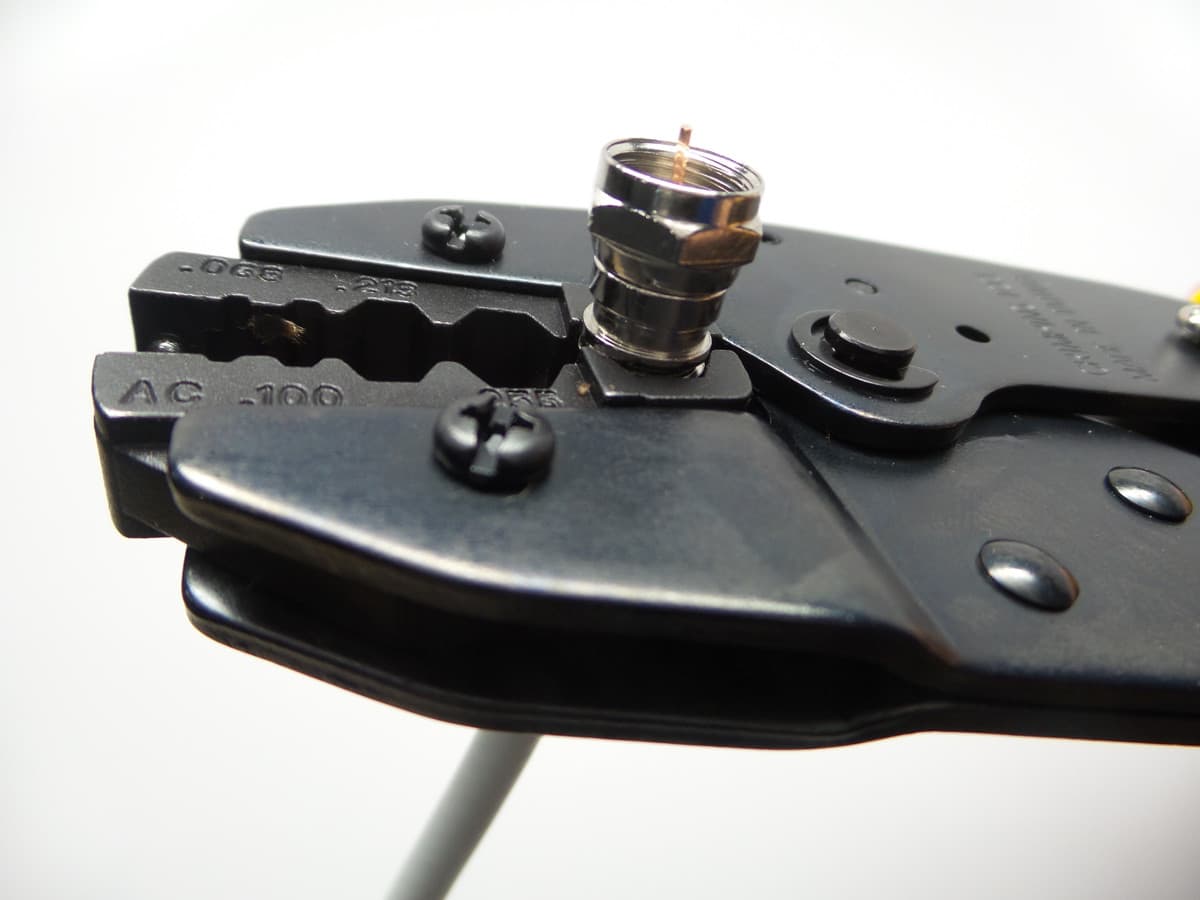
Insert the grip ring of the F connector into the .324 crimp setting of the TL-70 coax cable crimping tool. Squeeze the tool with both hands. It will ratchet down onto the connector. When it it ratcheted all the way, it will release it’s grip and you can remove the cable from the tool.
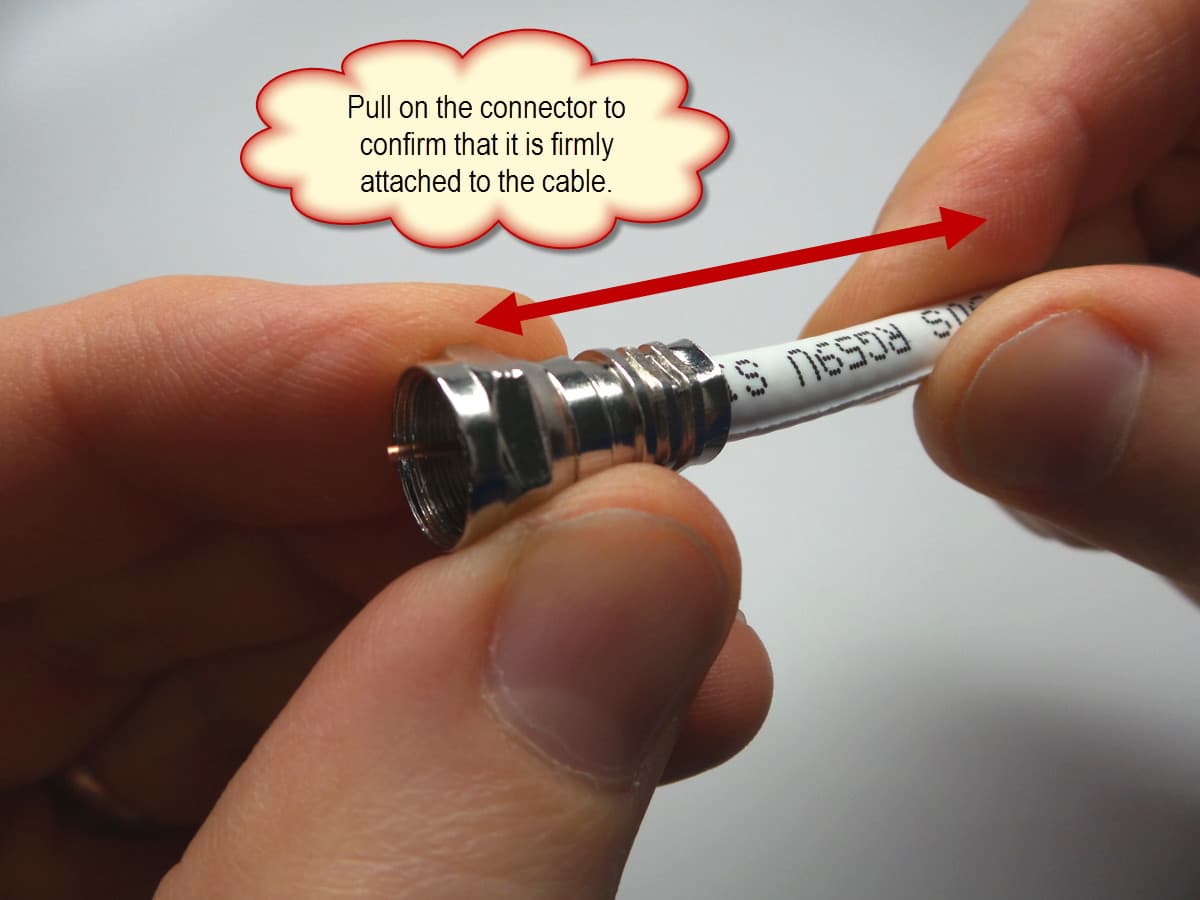
Pull on the connector to confirm that it is firmly attached to the cable.
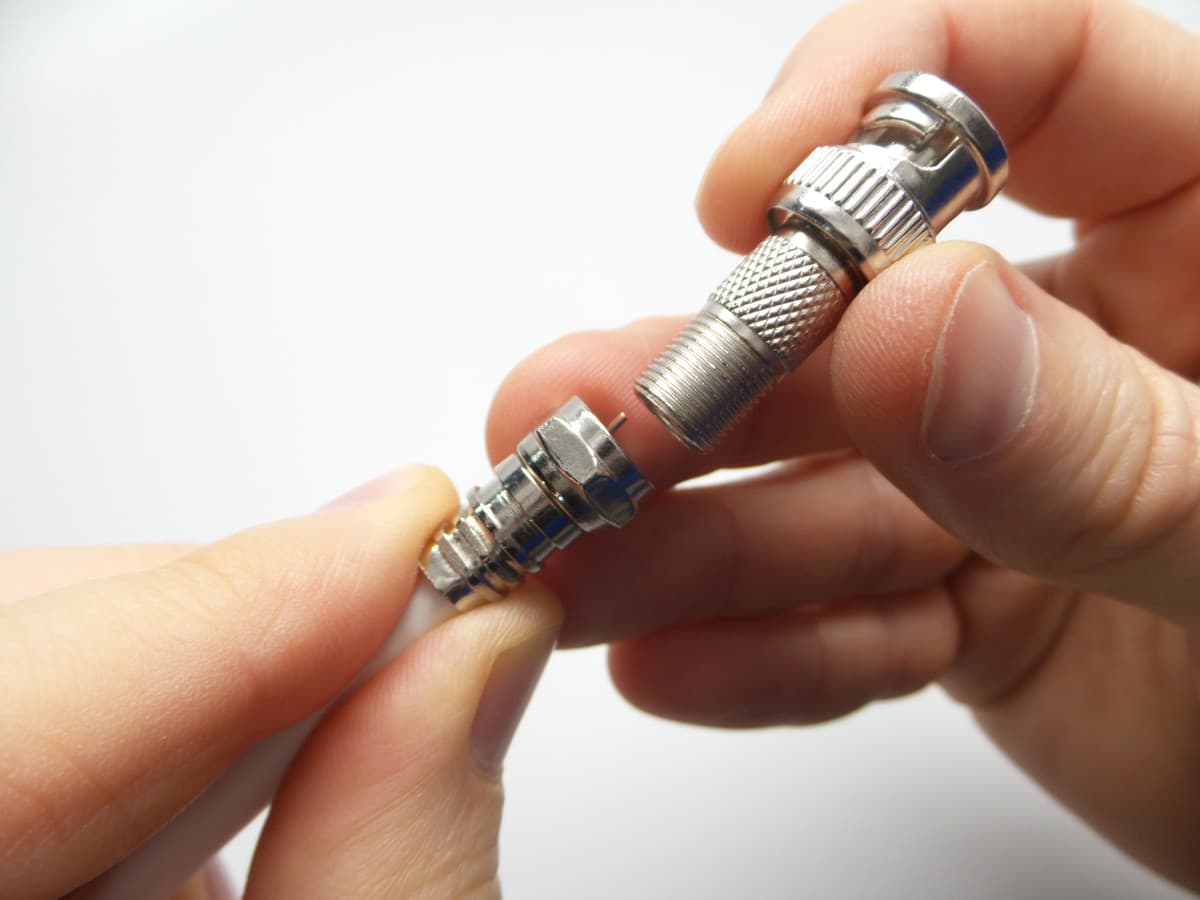 Last, if you are using this cable for a CCTV system installation and need a BNC connector, then screw a BNC male to F connector female screw-on connector in to the end.
Video Instructions
Here is a video that shows how these instructions can be applied.
More Installation Resources
Here are some additional resources related to security camera system installation.