Security Camera DVR Alarm Input Setup
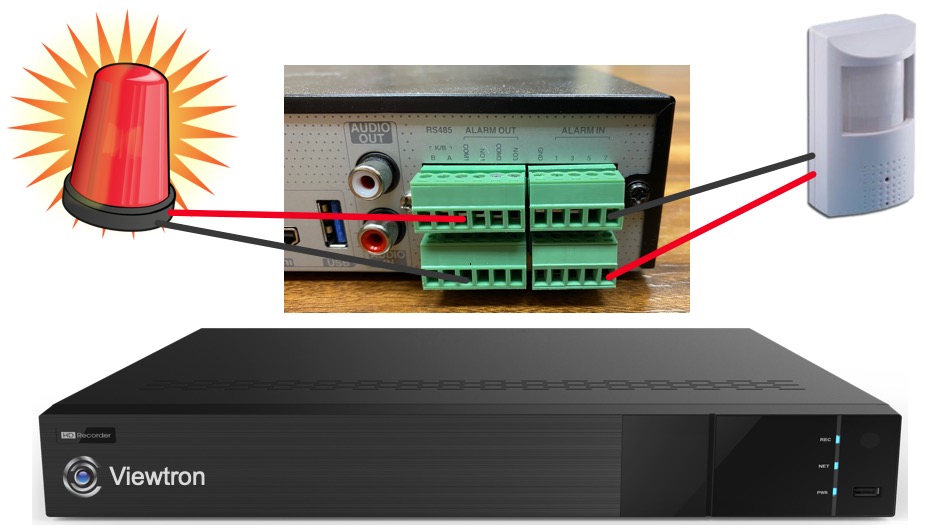
Watch this video to learn how-to connect an external motion detector to the alarm input of Viewtron security camera DVR. When motion is detected by the motion sensor, it triggers the following alarm actions.
-
- Trigger video recording on the camera associated with the alarm.
- Enable the alarm output on channel one, where I have an alarm light attached (turn the strobe light on).
- Pop-up live video of the camera associated with the alarm on the DVR’s display monitor.
Here are some additional actions that can be triggered from an alarm input.
- Capture a still image snapshot.
- Send a push notification to the mobile app for iPhone & Android.
- Enable the alarm buzzer on the DVR / NVR.
- Send an email notification.
Viewtron Video Surveillance Recorders
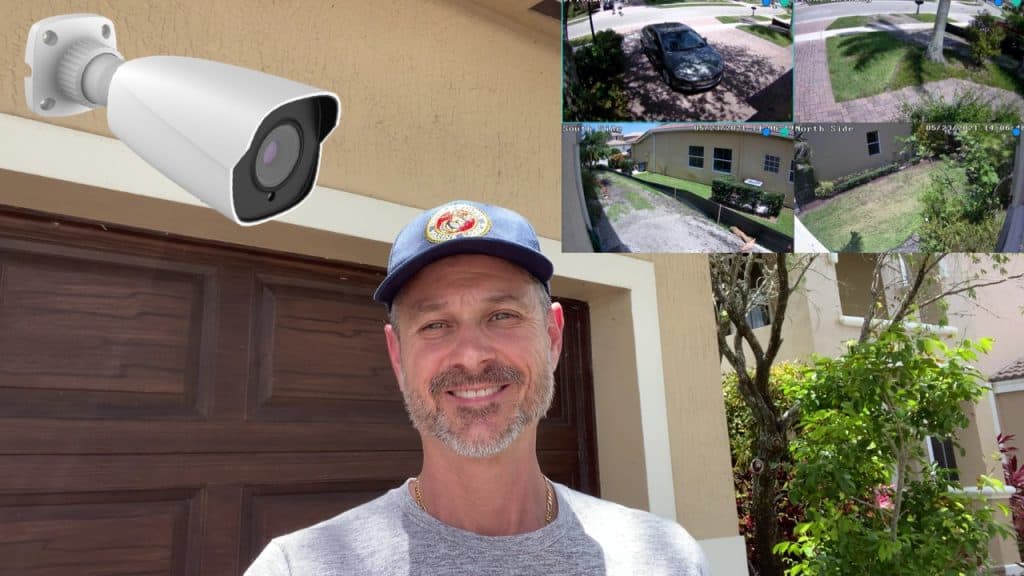
This video setup is applicable to Viewtron security camera DVRs (BNC cameras) and IP Camera NVRs (network IP cameras).
Video Transcript
Hi everyone. Mike from CCTV Camera Pros here. In this video I’m going to show you how to set up the alarm input ports on Viewtron security camera DVRs and NVRs. And to demonstrate this I’m going to use this PIR motion detector, and I’m going to wire that into one of the alarm input ports on the NVR, and then when motion is detected by that device I’m going to have it trigger a number of events.
First, I’m going to have it trigger the alarm output port where the strobe light is connected. Two, I’m going to have it trigger recording on camera four on the NVR. And then three, I’m going to have it pop up the video, the live view of that camera when that motion is detected.
So first let me explain how it’s wired in, it’s very simple actually. All you need is two wires, and I’m using one of the twisted pairs out of a CAT5 cable, and wire in the two output ports from the PIR motion detector to the ground and one of the alarm inputs on the NVR. Now that device has its own power supply, the NVR is not providing any power, that has its own power supply that’s not shown in that diagram.
Next let me show you how everything is configured on the NVR. Okay, so on the NVR to configure our alarm input select settings from the main menu, and then on the main setting screen select AI/event, and then on the AI event screen under general event select sensor. Our passive infrared motion detector is wired into alarm input one, and the first thing I’m going to do is I’m just going to rename it, and I’m going to name it PIR.
And then I’m going to run through some of these other settings, I’m not going to change all of them but just so you know what they are. For example, schedule. I’m going to leave this on 24 by seven, but you can set a custom schedule. And then type is either normally open or normally closed depending on the device you’re using. I click enable. And then duration is how long you want in between events, meaning that if an event is triggered and you don’t want another one triggered for five seconds or 10 seconds or 30 seconds, that’s what this duration means, the amount of time in between events that you want detected.
And next I’m going to configure it to record, the IP-C2 wireless IP camera. I’m not going to do a snapshot but you could also configure a snapshot if you wanted to. You could also configure push notifications to the mobile app if you wanted to. And this is where you do…I’m going to configure the alarm output. So I check this box and then check alarm out one and then move it to the triggered alarm out section and press okay.
And then the last thing I’m going to do is set up the popup video. So I’m going to set up the popup video to also be the Viewtron IP-C2, it’s just the little IP camera that I have sitting on the desk there that’s going to be monitoring the strobe light. When I’m done I click apply and then I can close out the screen with the X in the upper right?
Okay, so now that we have everything configured on the NVR this is what we’re going to do. I have the motion detector facing the wall so it’s not going to detect any motion right now. I’m going to stick my hand back there when I want to trigger it. And I have the strobe light sitting on the desk here, and our IP camera, the IP-C2 monitoring it. And that’s the camera that’s going to do the video popup. So when I trigger the motion detector the video popup, it’s going to go full screen, that’s what the video popup is, full screen on this camera and you’ll see the strobe light that is triggered.
So I’ll create some motion in front of it. There’s a slight delay, and then there’s the video pop up and you can see the strobe light going off. Now that video pop up will go back into the background, it will go full screen view again right there, and then when we want to disable this alarm output, turning off the strobe light essentially, we could come in here and on the alarm out one just clear it and that turns it off.
Here’s what that looks like from the DVR’s point of view. So when I reach around and trip the motion detector you’re going to see there’s a slight delay before the popup video gets engaged. There’s the popup video going to the IP-C2 camera and there you could see the alarm output one where the strobe lights connected and the strobe light turns on. And then in a few more seconds the popup video goes back and it switches to the four camera view.
And then here is how you turn off that alarm output, you select the manual alarm icon at the bottom of the screen, and then on the alarm output one just select clear and then close.
I hope this video’s been helpful in showing you how to configure the alarm inputs on Viewtron recorders. This is applicable to both the Viewtron BNC security camera DVRs, as well as the Viewtron IP camera NVRs. Both of them have alarm input and alarm outputs on the back of them.
If you have any questions about any of this feel free to email me anytime. I can be reached at mike@cctvcameraros.net. If you want to learn more about these Viewtron DVRs, NVRs, as well as all the BNC cameras and IP cameras that we carry please visit www.cctvcamerapros.com/viewtron. Thank you for watching.


