
AI Security Camera Person Intrusion Detection Setup
Watch this video to see how I setup the person detection / intrusion alarm using the Viewtron AI security camera and NVR installed at my house.
I recently upgraded my home security camera system from a BNC system to an all Viewtron IP based AI system. The only reason that I made this change was to take advantage of the AI software (artificial intelligence) built into these systems. Unfortunately, CCTV and HD CCTV cameras (BNC / coax) are not capable of these advanced analytics features. In my testing, the object detection ability of Viewtron AI cameras is so much better than traditional video motion detection used by analog coax systems.
I do want to make sure to mention the following. If you do not need object detection, our Viewtron HD BNC cameras do capture video just as clear as IP cameras. For example, a 4K BNC camera will record video just as clear as a 4K IP camera. And, we plan on supplying both BNC and IP solutions going forward. If you already have invested in coax cabling, a BNC system still might be the best choice for you. We can help you decide.
If you have any questions or I can help in any way, please let me know.
AI Security Cameras
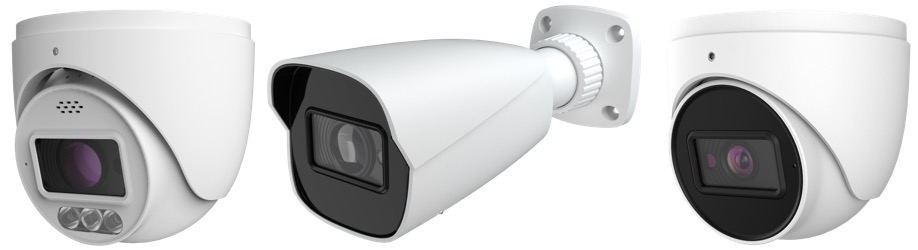
All Viewtron AI security cameras support the human detection that you saw demonstrated in the above video, including our best selling 4MP dome camera.
AI Security Camera Video Demos
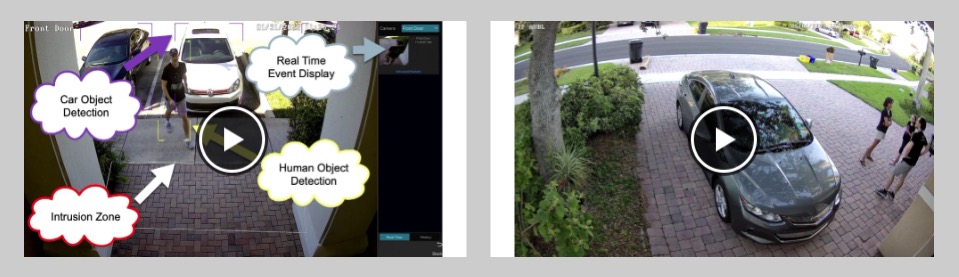
You can watch additional demo videos using Viewtron AI security cameras here.
Video Transcript
Here is a complete text transcript of this video.
Hi, everyone. Mike from CCTV Camera Pros here. I recently upgraded my home security camera system to an IP system using all Viewtron IP cameras and a Viewtron NVR. I installed two AI cameras to cover my front yard. One is that one behind me that covers this front area of my front yard, and I have a second one over here on the other side of my driveway installed here over in the corner of my house that basically covers my whole driveway. What I’m going to do in this video is I’m going to show you how I can configure the AI people detection, human detection, on the NVR so that if someone comes into my yard, let’s say late at night, maybe after 10 o’clock at night up until five in the morning. If anyone’s in my front yard, I want to make sure that that event is bookmarked on the NVR and that I know about it. You can also trigger alarms, like push notifications to the mobile app and even email alerts using this functionality. So I’m going to walk you through how to set this all up.
I’m controlling the interface on the NVR now, and the first thing I’m going to do is select settings from the menu. On the main settings screen under the AI event section, I’m going to select people perimeter detection. And then on this screen, I’m going to select the camera that’s covering my driveway and then select detection and then intrusion. I check this enable detection by IPC box to enable this type of artificial intelligence setting for this particular camera. Next, I’m going to draw a perimeter around the area where I want the intrusion to be detected, so basically, my driveway. If anyone enters my driveway, I want them to be detected. So I’ll basically just draw a shape around my driveway. And then for the detection target, I’m going to select people so that only people are detected. I don’t need to detect vehicles.
Next, I click on this trigger mode tab, and then what I want to do is select snapshot. That’s going to create a bookmarked event on the NVR so that I can easily go back and see what happened when these events are triggered. Now, if I wanted to, I could also select push here if I wanted to get a push notification on my phone. This is very easy to set up too, but I’m going to go over this in more detail in another video. So for now, just realize that when you trigger an event using these AI functions, in addition to recording, you can trigger other things like a push notification, an email alert, even triggering an external alarm can be done. So next, I’m going to go through the same process for the other camera in my front yard. So that one camera covers my driveway, and the second AI security camera covers the rest of my front yard to the right of the driveway.
So I’m going to go through the same process here and select intrusion and enable that type of detection. And then same thing, I’m going to draw a perimeter around the area where I want people detected. And the detection target, again, is just people. And I’m going to click apply there. And once again, go into trigger mode and select snapshot. And again, I won’t do push notifications in this video, but just know that that’s very easy to set up as well. So after I click apply, all those settings are in place, and then I’ll exit back out to the live view on the NVR. The next thing I want to do is test out the people detection function that we just set up. So I’m going to switch to the single camera view for my driveway camera. And on this screen I’m going to right click and then select target detection.
What this target detection function does is it enables visualization on the AI software on the NVR. So you’ll notice that, when I enabled that, a little window on the right opened up. And that’s going to be real-time detection of AI events that occur. And then you’ll notice on the main screen you can see the perimeter that I drew around the driveway that notates the detection area. And you can actually see the software is also detecting my car. Although we’re just doing people detection for the alarm, the visualization will show you all of the different types of objects that the software is detecting. So in a second, you’re going to see me approaching the view from the right-hand side of the screen. Here I come up the sidewalk. And you can see the software’s already tracking me as a person with that yellow box that’s around me.
And then when I cross the threshold of the intrusion detection area, you can see that that event is bookmarked on the real-time visualization on the right. And you see the software continues to track me as an object, whether I’m inside the detection zone or not. That’s what this visualization is doing. And I really just wanted to test right there to make sure the alarm was being properly triggered. Now that we confirmed that the AI software is working correctly and that intrusion detection zone is working correctly on my driveway, I want to set up the recording on the NVR. To do this, I select settings from the main menu and then record. On the recording screen, notice that I have the mode set up to customization. This gives you more flexibility of the different recording types and schedules that you can set up on these Viewtron NVRs.
Under the AI record schedule, I’m going to set my driveway camera and my walkway camera to the nighttime schedule, and then hit apply. So I’ll go into the schedule management screen here for a second and just show you how I set up this nighttime schedule. This is basically a custom schedule I set up that runs between about 10:00 PM, or about 9:00 PM, actually, and about 5:30 in the morning. And then back on the recording screen, notice that under time record schedule for all the security cameras on my system I do have them recording around the clock 24 hours a day. So the NVR is recording all cameras 24 hours a day. But in addition, it’ll bookmark any intrusion events on those two cameras on my front yard anytime intrusion occurs during the night schedule. I hope this video was helpful. If you want to learn more about these Viewtron security camera systems and some of the other AI functions that are supported, please visit www.cctvcamerapros.com/ai. Thank you for watching.


