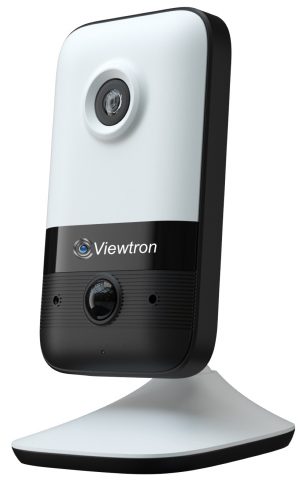
Viewtron Wireless Camera for CCTV DVR Setup
The Viewtron IP-C4 wireless IP camera works great with Viewtron hybrid CCTV DVRs. This is because Viewtron DVRs are compatible with IP cameras, in addition to analog CCTV and HD over coax security cameras. As a matter of fact, the only major type of security camera that does not work with Viewtron hybrid DVRs is HD-SDI format cameras, which are rare.
IP-C4 Wireless Security Camera DVR Setup
Follow these instructions to setup the Viewtron IP-C4 wireless security camera with your Viewtron DVR. Please note that these instructions also work for Viewtron IP camera NVRs.
There are two methods for connecting the Viewtron wireless camera to your router.
Both method require that you connect your DVR to your network router. Please note that you can also connect the DVR to a network switch that is connected to your wireless router.
Step 1: Connect DVR to Network Router

If you have not already connected your DVR or NVR to your network, you should do this first. Connect your DVR to your network router or switch with a CAT5E or CAT6 network cable. The RJ-45 network port is located on the back of the DVR as seen above. Viewtron DVRs and NVR do not have built-in wireless capability. You must connect the DVR to a network that has a wireless access point. The most common way this is done is by connecting the DVR to one of the hard wired ports on a wireless router.

This is what a typical home or small business network setup looks like. The CCTV cameras are hard wired to the DVR with coax cable. The DVR or NVR or hard wired to a wireless router with CAT5e or CAT6 cable.
Wireless Setup Method 1: WPS Router Setup

If your network router supports WPS, you can follow the instructions in this section. If your router does not support WPS or you can not get the connection working via WPS, then skip to the next section, labeled Wireless Setup Method 2.

The Viewtron IP-C4 includes a 12V DC power supply. Connect the power supply to the back of your camera and plug in to a power outlet. It will take the camera about a minute to fully boot up.

On the back of the camera, there is a reset button / pin. This reset button is also used to connect the camera via WPS. You can use a paper clip or very small screw driver to press this when ready. You must press the WPS on your router first though.
IMPORTANT NOTE: pressing this button in for more than 3 seconds will reset the camera to the factory default settings. To connect WPS, you use a quick / one second press.
Follow these steps to connect the wireless camera to your WIFI router via WPS.
- Press the WPS button on your router, this will enable WPS connections on your router for a few minutes. For some routers, it is enables for 2 seconds. Check the manual for your specific model to know for sure.
- After you press the WPS button on your router, quick press the reset button on the Viewtron IP-C4 within 1-2 minutes. Remember to press the reset button on the IP camera only for one second for the WPSS function.

If your camera successfully connects to your wireless network, the camera’s status light will flash blue. Your camera is now accessible to your Viewtron DVR / NVR and you can skip ahead to the section labeled “Add Wireless Camera to DVR”.
Wireless Setup Method 2: Manual WIFI Connection
Follow the instructions in this section if your router does not support WPS or you could not successfully connect via WPS.
Connect IP Camera to Network (Hard Wired First)

In order to manually setup the wireless connection, you must first hard wire the Viewtron IP-C4 to your network. In the above image, I connected our Viewtron IP-C4 to a PoE switch. If you do not have a PoE switch on your network, you can also connect the IP-C4 to one of the ports on the back of your wireless router. However, most routers network ports are not PoE (power over Ethernet), so you will also need to plug your camera in using the 12V DC power supply provided.
Locate your IP Camera on your Network
Now that your camera is connected to your network, you must locate it’s IP address so that you can log into it via a web browser. You can use your DVR or NVR to locate the IP camera’s IP address.
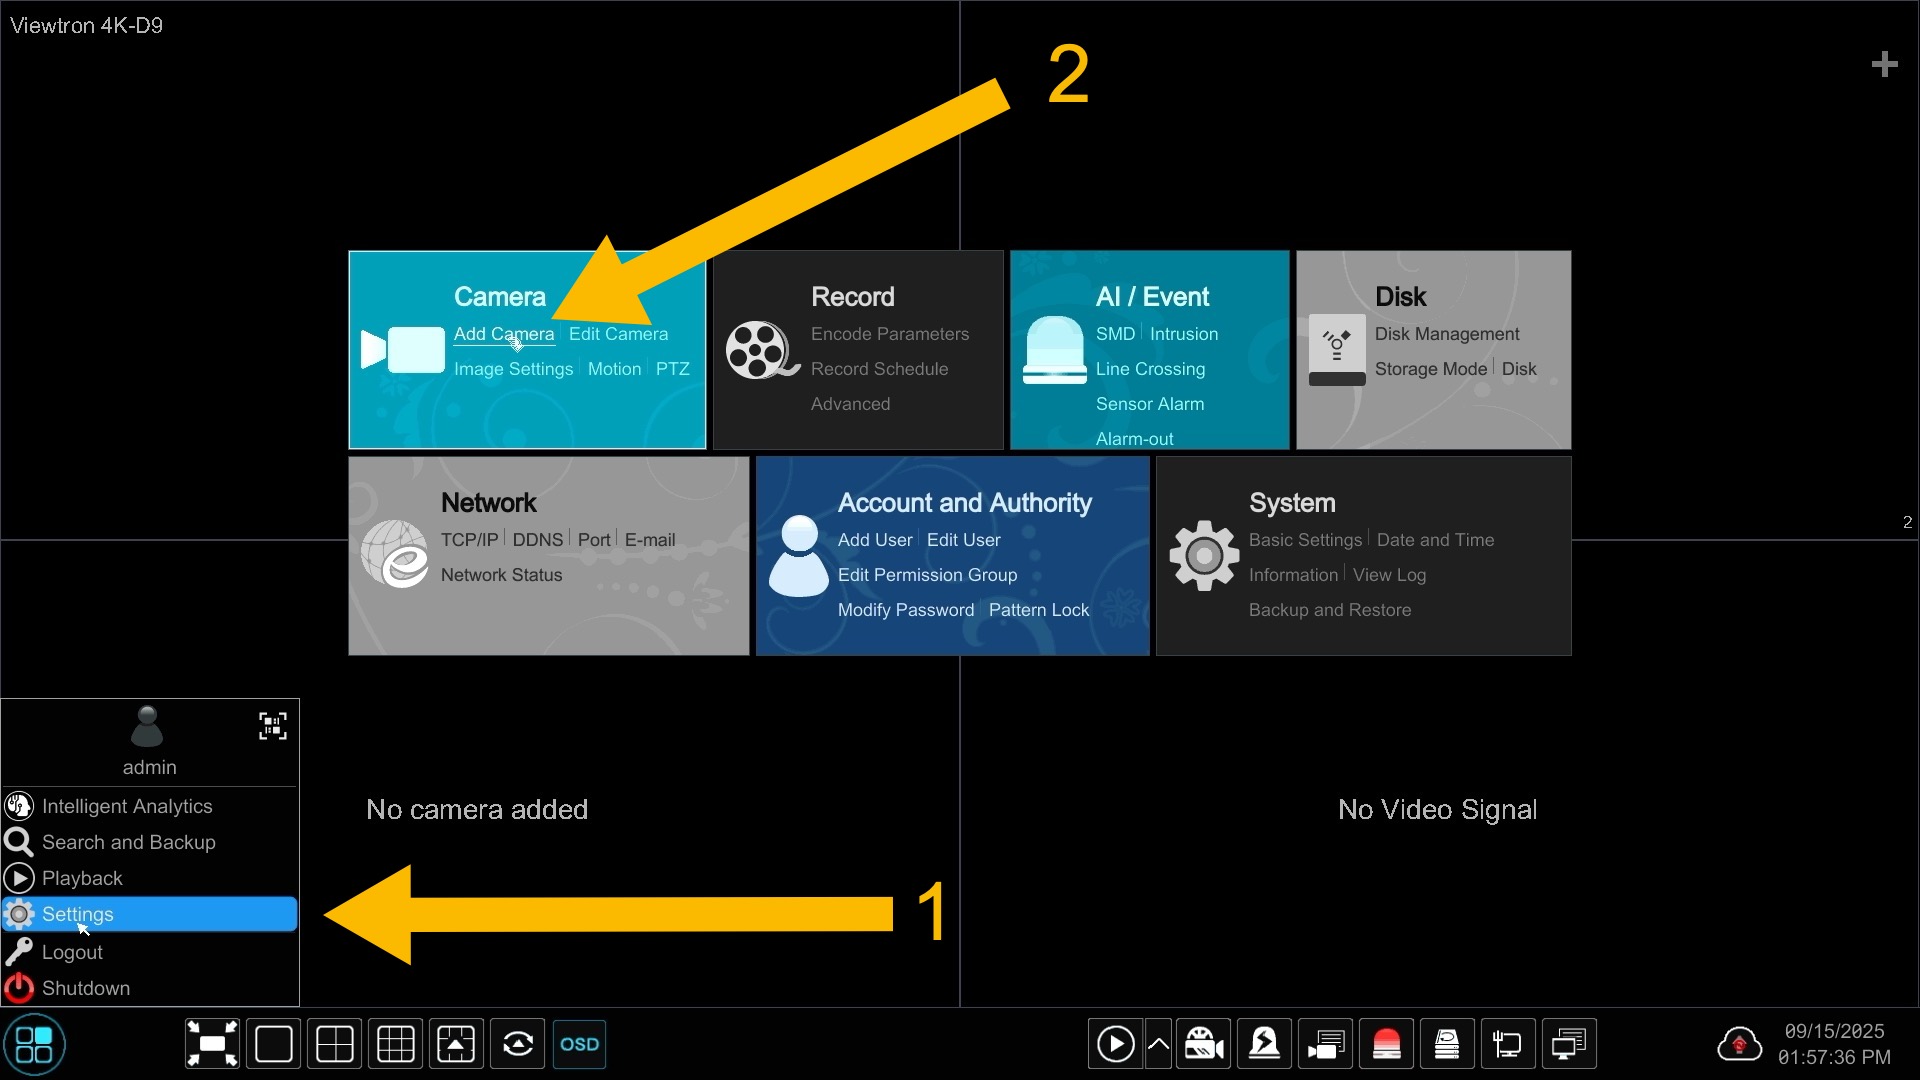
On your Viewtron DVR, click on settings from the button menu. Then, click on the Add Camera link.
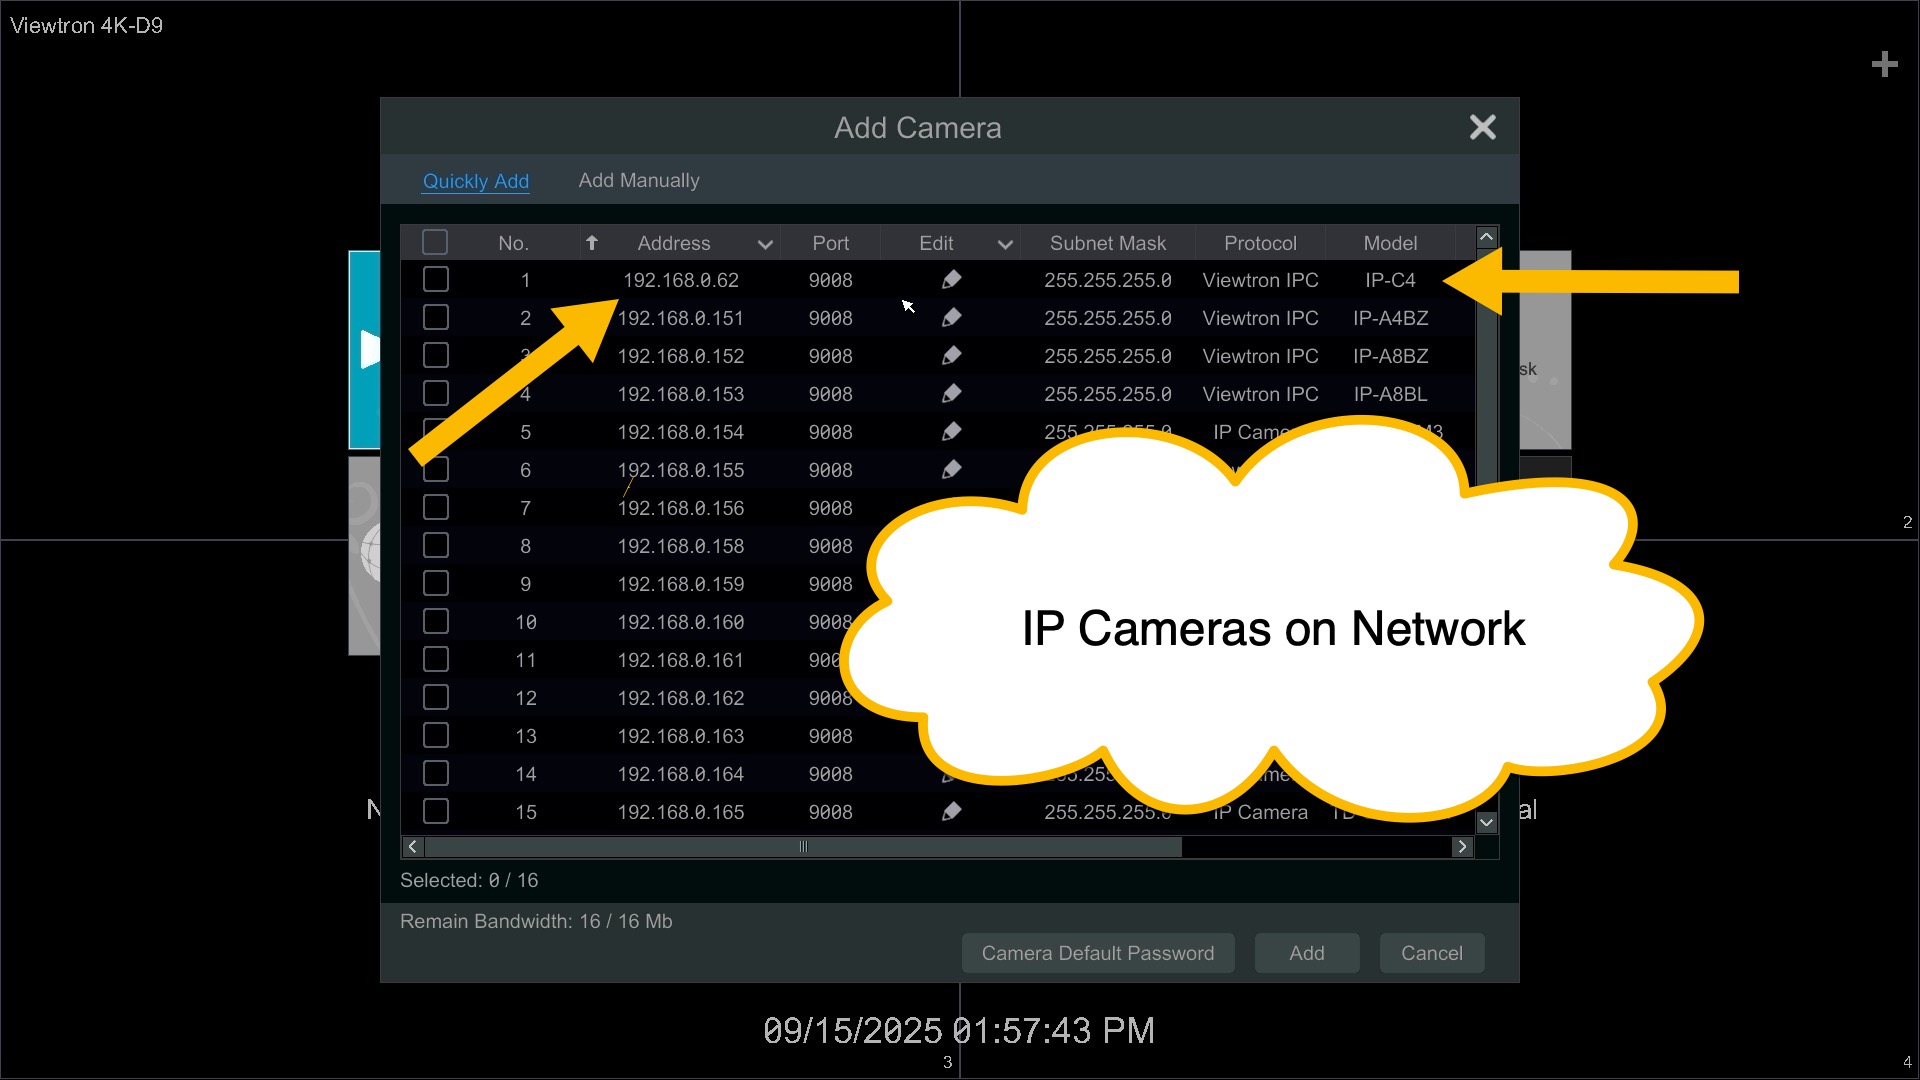
The DVR will search the local network for all IP cameras. You can see at the top of the list above is our Viewtron IP-C4. You can see the local IP address. After you note the IP address, you can close this screen by clicking on the Cancel button. We are not going to add the camera to the DVR until it is connected over the wireless connection, in case the IP address changes.
Log into IP Camera in a Web Browser

Using a Windows or Mac PC that is on the same network as your DVR and IP camera, type the IP address of your IP camera into the web browsers address bar. Then, enter the default User Name and Password for your IP camera. The default Name is “admin”. The default password is “123456”. You may be required to change these when you first login. Please make note of the new password if you change it,.

Once you are logged it the camera, click on the Config tab in the upper right. Then, click on the WIFI link in the Network section.

On the WIFI security camera configuration screen, do the following.
- Click on the Enable check box.
- Click on the Search button to search the area for all available wireless networks.
- Select the wireless network that you want the wireless camera to connect to.
- Enter the wireless network Key / Password and click on the Test button to test the connection.
Scroll down lower on the screen.

Lower on the screen, you will see a section where you can 1) enable a static IP address and 2) Save the WIFI settings.
You do not want the IP address of the camera to change every time you plug it in somewhere because the DVR will not be able to connect to it. You can either specify the static IP address here on the camera or you can reserve the IP address on your router. The process is different depending on the make and model of your router and we can not document all of them. However, it is my preferred method for reserving an IP address for a device.
If you do not know how to reserve an IP address for the camera on your router, then select “Use the following IP Address radio button and fill in the IP address of the camera. Leave the Subnet Mask 255.255.255.0. You may need to change the Gateway IP address to match the range of the IP camera. For example, if your IP camera is in the 192.168.0 range, then you most likely need to set the Gateway to 192.168.0.1. You can set the Preferred DNR Server to the same IP address as the Gateway. The Alternate DNS Server can be set to 8.8.8.8.
Click on the Save button when done.
You can now disconnect the camera from the hard wired connection to your network and disconnect the power supply.
Connect IP Camera to Power
The Viewtron IP-C4 includes a 12V DC power supply. Connect the power supply to the back of your camera and plug in to a power outlet. It will take the camera about a minute to fully boot up.
If your camera successfully connects to your wireless network, the camera’s status light will flash blue. Your WIFI security camera is now accessible to your Viewtron DVR / NVR.
Add Wireless Camera to DVR
Now you can add the camera to your DVR.
On your Viewtron DVR, click on settings from the button menu. Then, click on the Add Camera link.
The DVR will search the local network for all IP cameras. You can see at the top of the list above is our Viewtron IP-C4. Click on the checkbox next to the camera that you are adding to the DVR. Then, click on the Add button on the bottom of the screen.
IMPORTANT NOTE: if you changed the password of your IP camera, your DVR will not be able to connect to it.
To fix this, click on Settings again and this time select Edit Camera.

On the Edit Camera screen, you will see that the IP camera is “Offline”. Click on the Pencil Edit icon.

On the Edit Camera screen, enter the correct password. Then click Test to test the connection. If successful, click on the save button.
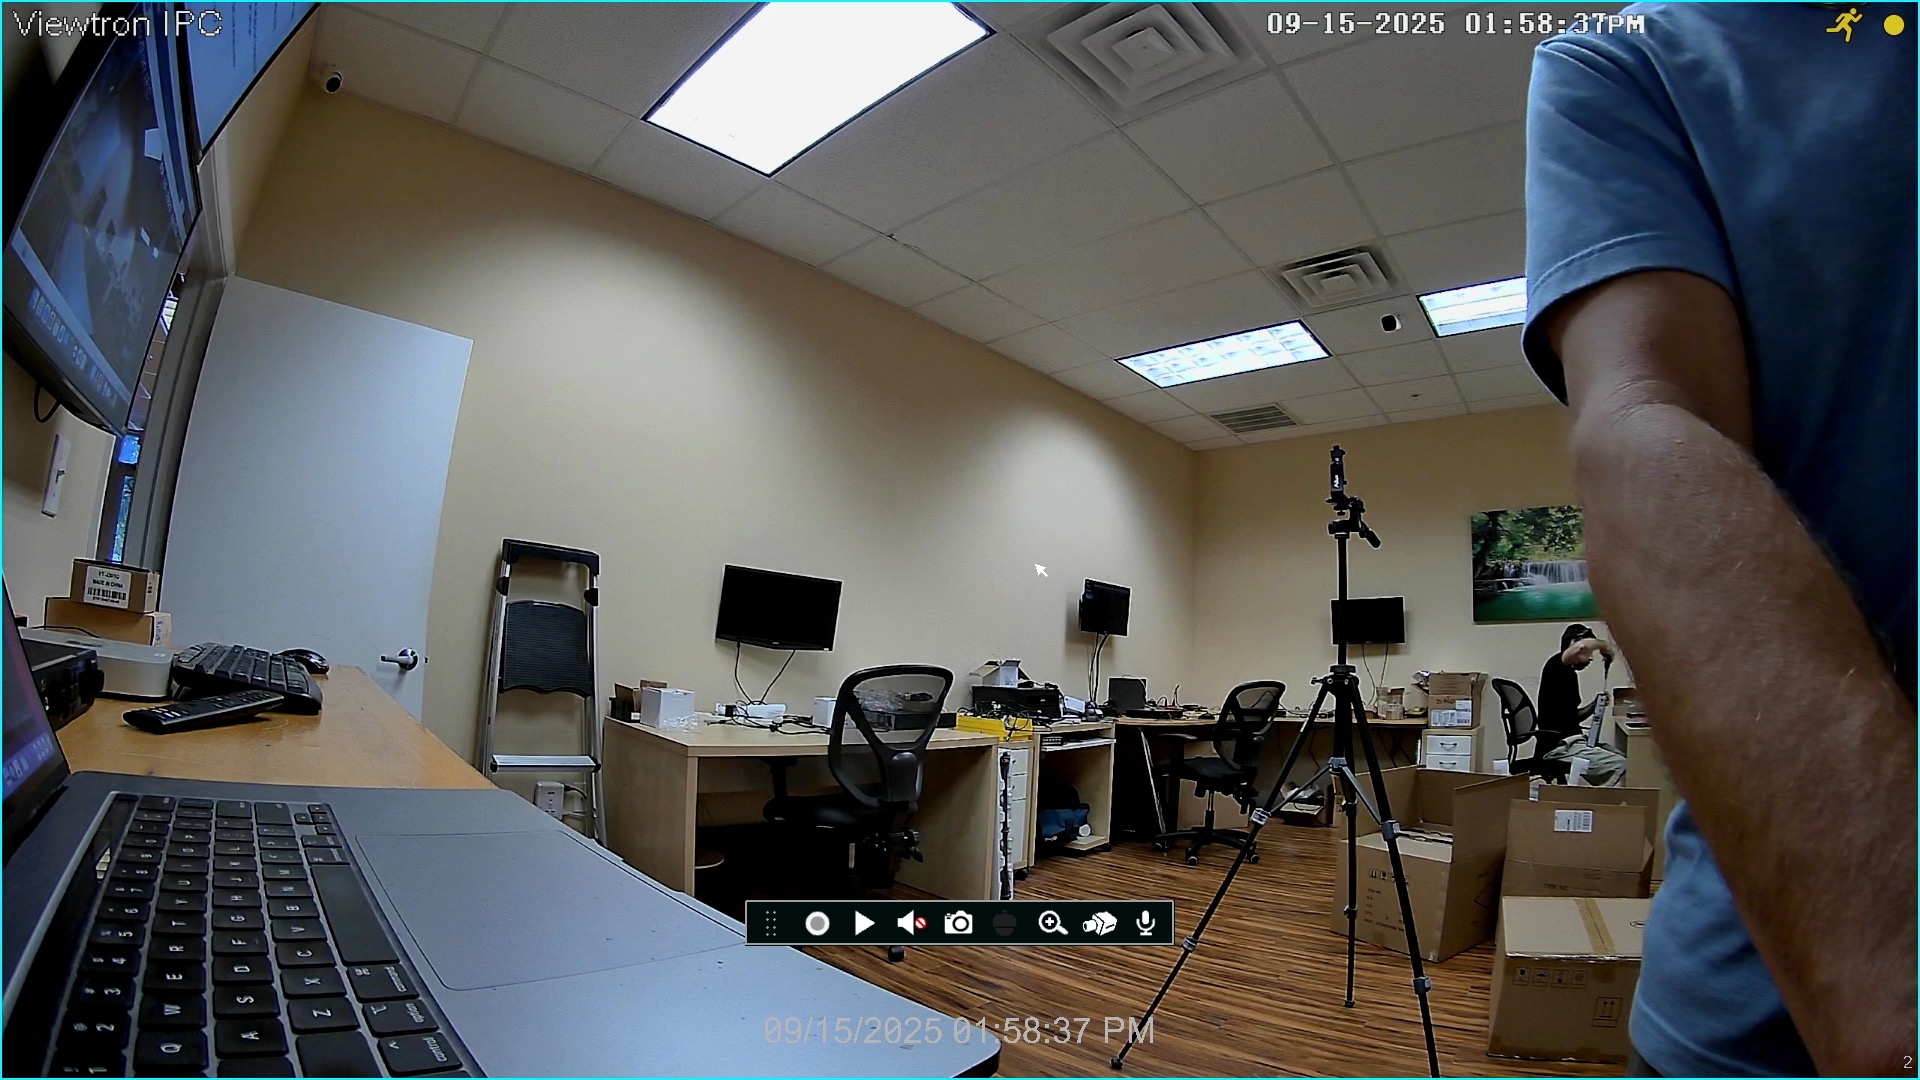
Close the settings screen and return to the live security camera view on the DVR. You can now see a live video display of the wireless camera.
Additional WIFI Security Camera Features
The Viewtron IP-C4 supports the following important features. You can learn more about the Viewtron IP-C4 here.
- 4 Megapixel HD Video Quality
- Smart Detection / Smart Motion Detection Support
- Micro SD Card Slot for Local Storage
- Infrared Night Vision
- Two Way Audio from Mobile App
- Remote Viewing from Mobile App and Desktop Software
- Built-in Microphone
This camera is great for business and home security.
Mobile App for Wireless Security Camera
Most of our customers want to setup the mobile app for iPhone and Android so that they can view their security cameras remotely. You can find the setup instructions for the mobile app here. You can watch a bunch of video demos using the mobile app here.
Have Questions / Need Help?
If you have any questions about setting up the Viewtron wireless camera for CCTV DVRs or IP camera NVRs, you can email me at mike@viewtron.com. You can also email me with any additional questions and if you need help with a system design or consultation.
Related Security Camera Products and Pages
- Smart Motion Detection Security Camera Reduces False Alarms
- Infrared Night Vision Security Cameras
- Two Way Audio Setup for Viewtron Security Cameras
- Pan Tilt Zoom Cameras with AI Smart Features
- Remote Viewing Setup for Mobile App
Video Transcription
Here is a text transcript of the video on the top of this page.
Hey guys. Mike from CCTV Camera Pros here. In this video I’m going to show you how to set up our wireless security camera with a CCTV DVR, specifically our Viewtron Hybrid DVR. So, typically you can’t use wireless security cameras with analog DVRs, because wireless cameras are IP cameras and most analog DVRs don’t work with IP cameras. But the Viewtron Hybrid DVR, I have one right over here. In addition to being compatible with all the main BNC video formats and video resolutions, it also works with IP cameras up to 4K resolution. And we have this really nice 4 megapixel cube camera. It’s the Viewtron IP-C4 that you can use either hardwired, it has built in POE, or, or it has built in WIFI and you can connect it over a wireless network.
And this is a layout of how it works. So all your BNC cameras are hardwired to the DVR just like a traditional CCTV DVR. And the DVR has to be connected to your wireless router or on the network with a wireless access point. And then when you connect the Viewtron IP-C4 over WIFI, now that camera is on the same network as the DVR and the DVR can connect to it. And I’ll show you how that’s done in a minute. For people that have an existing CCTV camera system and that want to do this, you will need to upgrade to a Viewtron Hybrid DVR, which there’s other benefits. It’ll work with all your existing legacy CCTV cameras and, and you could start upgrading those to HD-over-Coax cameras up to 4K. And then you can also use Viewtron hardwired IP cameras and this Viewtron wireless IP camera.
But your network router or your access point has to support 2.4 GHz Wi-Fi band. This does not work with, with 5 GHz. And one of the ways that you can have this connect to your network is using WPS. WPS stands for Wireless Protected Setup. And if your wireless router has that, it’ll have a WPS button on it that you can click and then for like two or three minutes, it enables you to connect WPS compliant devices to it. So in the case of the Viewtron IP camera, the little reset pin on the back, you just click that once quickly. Don’t hold it in because that resets the firmware. You just hold it for one second and then it would automatically connect to your wireless router. That’s the easiest way to do it.
But not the way I’m going to go over in detail in this video. I’m going to go over the more typical way, which is a bit more manual. To set this up, you have to hardwire the camera to your network at first. So I have this hardwired to this POE switch. The POE switch is connected to our router. So it’s on the same network as the Viewtron DVR. So, this is already fired up and I have it running over here.
And the first thing that you need to do after you log in is go into config. My login timed out, so let me log back in. If you click on the Config tab and then under Network, click on WIFI. You have to check this Enable wireless network button here. And then you could search the area for all the wireless access points. Then you simply just click on the one that you want to use, and then you enter in the wireless password key down here and you can click Test to make sure that it’s able to connect to that network. It says test successful, so we are good to go.
So if I click Save now, this camera is configured to connect to the wireless network here in the office. Before we move on, another thing that you may want to do at this point that I recommend is changing the camera to the static IP in the camera’s firmware or reserving this static IP for it on your router. That way, if you unplug this and put it somewhere else when it connects to your network, it’ll always connect to that same IP address and the DVR will connect with no interruption. The DVR will just connect right back up. But if that IP changes, you have to redo some of this. So you’ll want to change to a static IP address from the obtain IP address automatically setting. Okay, so once this is able to connect, you click Save here and then now you can unplug the camera from the hardwired network connection.
And then you can use the power supply that’s included with the camera and you can drop this anywhere in the office now and plug it in to power. And then it will connect up to the network. So I’m going to let that boot up. It takes a couple minutes. And then I’m going to show you how to add this camera to the Viewtron DVR. While that’s booting up, I’ll go over a couple other things.
So again, once this works, you can plug this in to power and use it on demand. So this is this is an indoor wireless IP camera. This is not really meant for outdoor use. Though I’ve used it in my covered patio before. But it’s completely protected from rain and moisture. You can’t have this exposed. It’s really an indoor camera. And wireless cameras, if you’re using an indoor wireless access point, they’re really only going to connect to connect good to a outdoor camera.
What is this used for? One of the ways I use it is every now and then, if we’re going out for a while and we want to keep an eye on our cat, we can plunk it down by the area she is that she hangs out. Or if we put her in her cage, we call it a nest, and we just want to keep an eye on her, it’s great as a pet camera. If you have an elderly person that you’re taking care of in your home, it makes a great nanny cam because you could put it in your loved one’s room or in the living room where they are. You can use more than one of these just to keep an eye on them when you’re away. If you have a caregiver that comes into your house and you want to make sure that they’re doing things that they’re supposed to and not doing things they’re not supposed to do. And again, just keeping an eye on the safety of your loved one, it makes for a great nanny cam. We have people use this at vacation homes when they’re not there.
If they want some extra protection and they want to be able to remotely log into their house, just check on things. It’s great for vacation homes. When it’s not there, unplug it, put it away. When you leave for an extended period of time, just plug it in and put it where you want it. It’ll just automatically connect back up. You could use it to monitor workers in your home. Let’s say you’re having bathroom or a kitchen remodeled and you need to step out. You’re just not always there and you want to keep an eye on these workers when you’re not there, that’s a great use case right there.
If there’s a problem area of your home where you have fixed a leak recently and you want to, when you’re away, peek in and make sure everything is good to go, that’s another use case. Okay, so it’s, it’s now booted up. It’s connected to the wireless network. And I’m going to switch the TV display over now. I’m going to make the wireless camera connect to the DVR over here. On the Viewtron DVR, I don’t have any cameras connected to this DVR right now. So if you go into Settings and then go into Add Camera. On this Add Camera screen, it scans the network for all of the IP cameras that it can find. So these are all the Viewtron IP cameras that are installed at our office and we have a bunch of them.
But at the very top is the Viewtron WIFI security camera. So I’m going to check the box next to that and click Add. So one other thing that you’ll need to do is if you go back into Settings and go into Edit Camera, you’ll need to change the password to whatever your camera’s password is. I changed the default password on mine, so I’m going to change it to what I changed it to. And I’m going to click Test to make sure that it can connect test successful. So then I’ll click ok. And this offline status should change to Online here in a few seconds after it syncs up. Now it’s online.
So I then close out the setting screen and then there it is. There’s the live view, there’s the full screen view of the camera. So now whenever I want to use this, I can simply just plug it in at any location that’s within the range of our wireless router and it’ll automatically connect up to the DVR. So it’s very typical to have a hardwired CCTV camera system in place and then use this on demand as needed. Just plug it in. Or if you have some location that you never ran BNC cable to inside the house, which is typical. Usually people don’t have BNC cables run inside their house. You could just put this on a shelf or a desktop anywhere.
Guys, if you have any questions in regards to setting up this Viewtron wireless security camera with our Viewtron Hybrid DVRs, it obviously also works with the network recorders (NVRs) that we have for the IP cameras. You can reach out to me anytime. I can be reached at mike@viewtron.com. If you want to learn more about the Viewtron Hybrid DVRs that work with this, you can go to www.viewtron.com/DVR. If you want to learn more about the Viewtron wireless camera, it’s the Viewtron IP-C4. That’s the model number. You can go to www.viewtron.com/C4. Thank you for watching.


