
How-to Install a Wireless Elevator Security Camera System
Installing a elevator security camera (elevator CCTV camera) comes with some obvious challenges. Because elevators move, wiring a security camera to a DVR (digital video recorder) is not really possible. This article discusses how-to overcome this challenge by using an ELT-L1350 wireless elevator camera system. The system consists of a high definition elevator CCTV camera (1080p AHD video format) and a wireless transmitter system (video transmitter and receiver). This system creates a “wireless CCTV video bridge” so that real time video can be recorded to a DVR without hard wiring coax cable directly from the camera to the recorder.
Please note that I prefer using HD-over-Coax type security cameras, like the one used in this system over network IP cameras. I wont go into detail as to why in this post but you can read about why I prefer coax security cameras over IP cameras here.
Elevator Camera System Installation
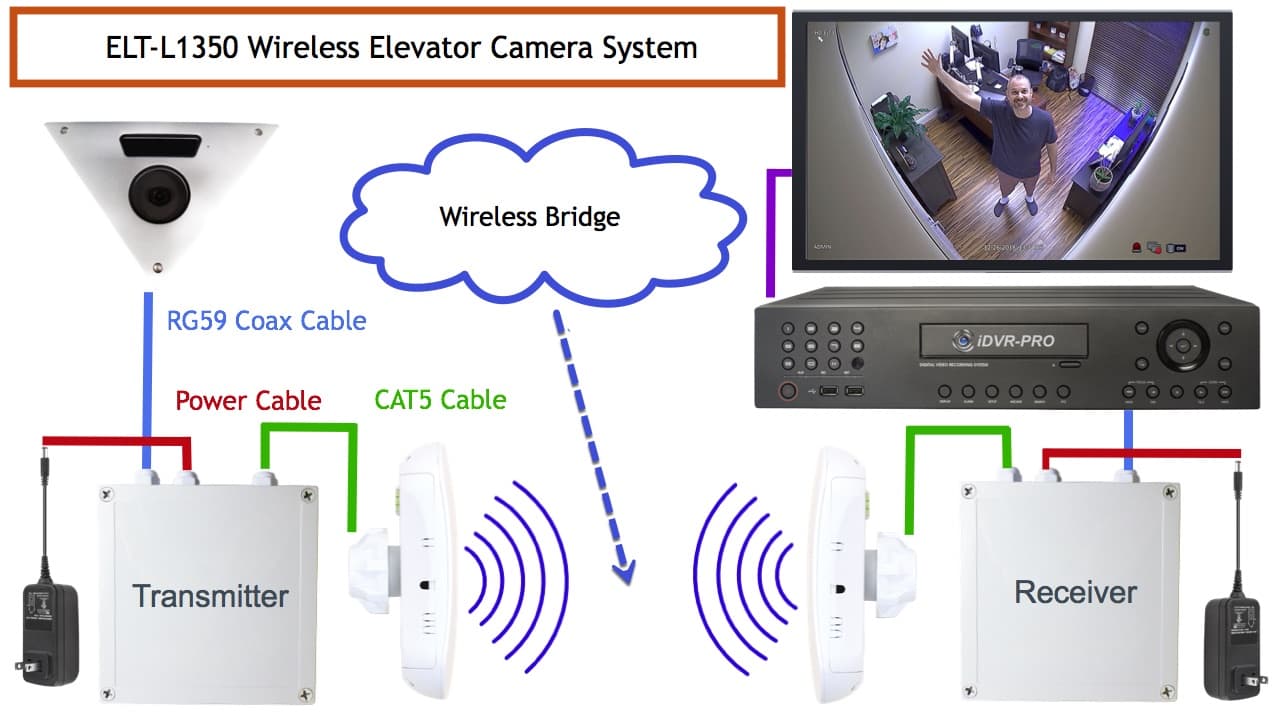
The above diagram shows how the elevator camera installation works.
- The elevator camera is mounted to a corner of the elevator (near the top of the elevator cabin). This corner mount camera is perfect for elevators because of its ultra-wide angle lens which eliminates any possible blind spots. This is an AHD type security camera (analog high definition) which uses the same type of coax cable as traditional analog CCTV cameras. The camera is easy to mount. First, removing the metal front cover plate, then mount the base of the camera using two screws.
- RG59 Siamese coax cable is used to connect the camera to the BNC video input of the transmitter box. Please check out this article if you are not familiar with how-to wire CCTV security cameras with RG59 coax cable. The transmitter box and antenna are installed on the underside exterior of the elevator cab (see image below).
- CAT5 cable connects the video transmitter box to the transmitting antenna.
- The 12V DC power supply connected to the video transmitter box supplies power to the transmitter, antenna and elevator camera. The power is supplied to the antenna using PoE (power over Ethernet).
- There are DIP switches on the antennas that allow the installer to specify which antenna will transmit the video signal and which will be the receiver.
- RG59 coax cable is used to wire the BNC output of the video receiver to a DVR.
- The DVR will likely have a monitor connected to it and may have additional cameras connected besides the elevator camera (depending on the application). The DVR used for an elevator camera installation is typically shared with other security cameras around the building.
Again, the result of using this system is that elevator video can be recorded on a security camera DVR without running cable all the way from the camera.
Elevator Camera System
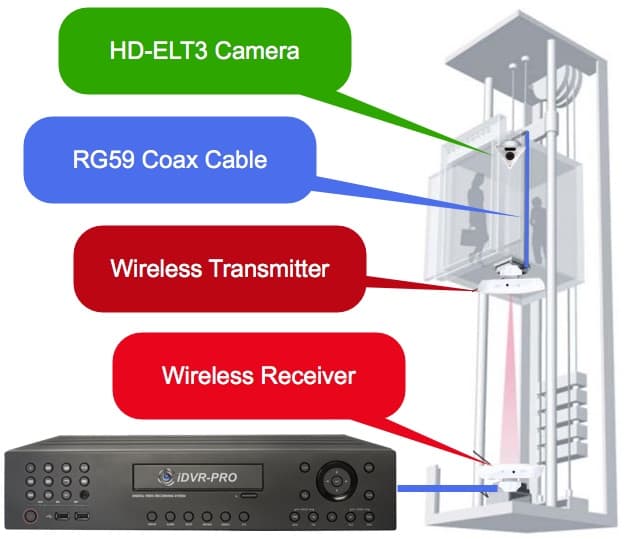
The above image shows the placement of the wireless video transmission system components in relation to the elevator cabin and shaft. The transmitting and receiving antennas should be directly aligned in order to have a stable WIFI connection.
Video Surveillance Demo
Here is a video surveillance demonstration using the HD-ELT3 elevator camera. The demo was captured in my office. This is because I do not have access to use actual surveillance footage captured using an installed elevator systems. During testing, I did learn that the wide angle lens and sleek design of the HD-ELT3 also make it a great choice for non-elevator installations. This camera actually looks great in my office. I am leaving it installed for now.
If you are watching this video from a desktop computer, please be sure to adjust the YouTube player to 1080p HD resolution.
Corner Mount Camera Installation
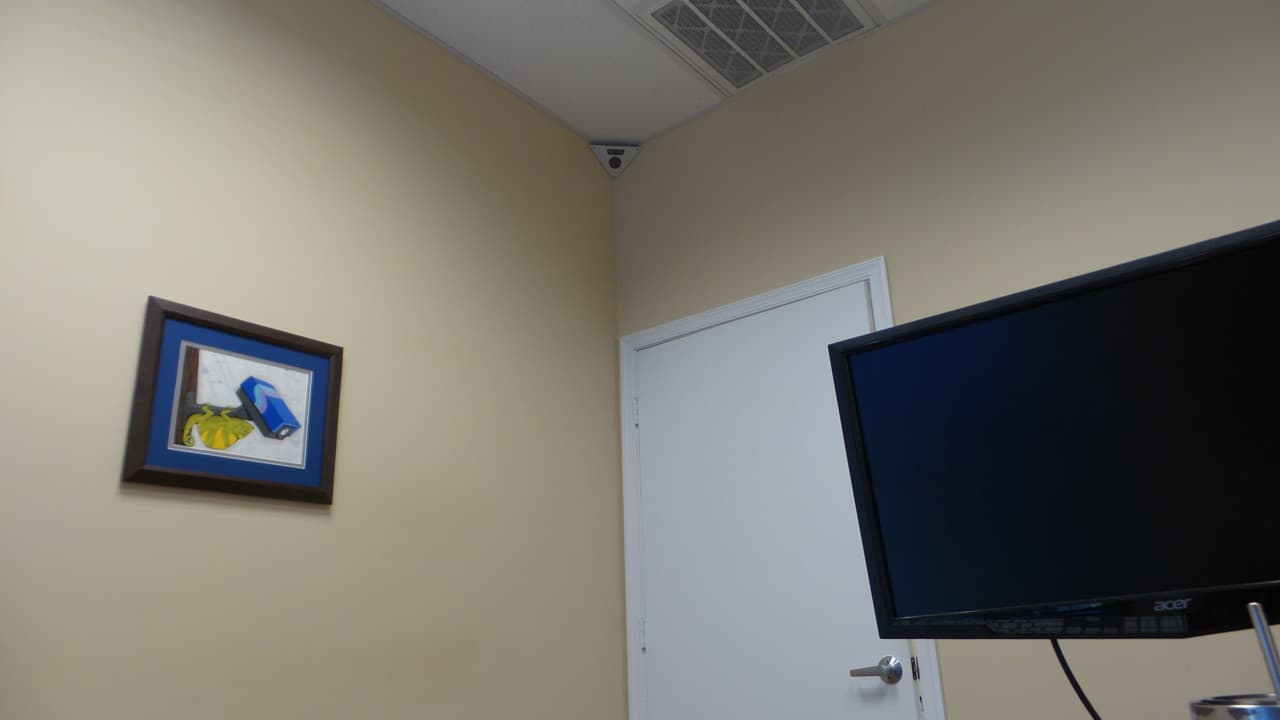
This is what the camera looks like when properly mounted in the corner of an elevator or room. The only way to mount this camera is to a 90 degree corner where two walls meet.
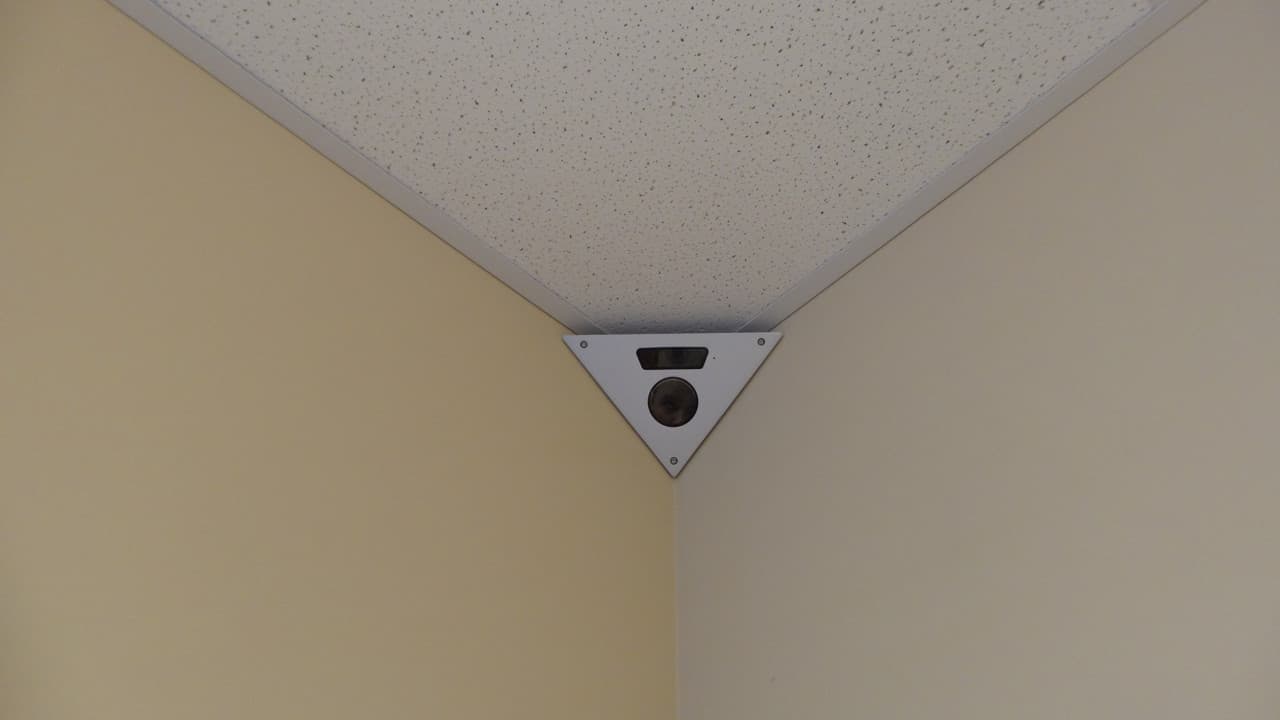
Here is a closer up view of what the camera looks like installed. The glass window above the circular lens window is where the infrared LEDs are located. This enables the camera to see in low light and complete darkness. If the elevator lights loose power, the camera will still capture video as long as it does not loose power. Battery backup systems can be used.
Wireless Video Transmission System
Here are some close-up images of the individual components that make up the wireless elevator video transmission system.
Video Surveillance Camera

Here is a close-up of the HD-ELT3 elevator surveillance camera. Here are some of the camera’s main features.
- Fixed Wide Angle 2.9mm Lens
- 104° Horizontal Angle of View
- 4 Selectable Video Formats AHD, HD-TVI, HDCVI, Analog (CVBS)
- 1080p HD Video Resolution (1920 x 1080)
- 960H Resolution (960 x 480) in Analog CVBS Mode
- Vandal Resistant Metal Front Cover
- Built-in Infrared Night Vision for Low Light and Zero Light Surveillance
This camera can be supplied by itself or with the optional wireless transmission system.
Wireless Video Transmitter & Receiver
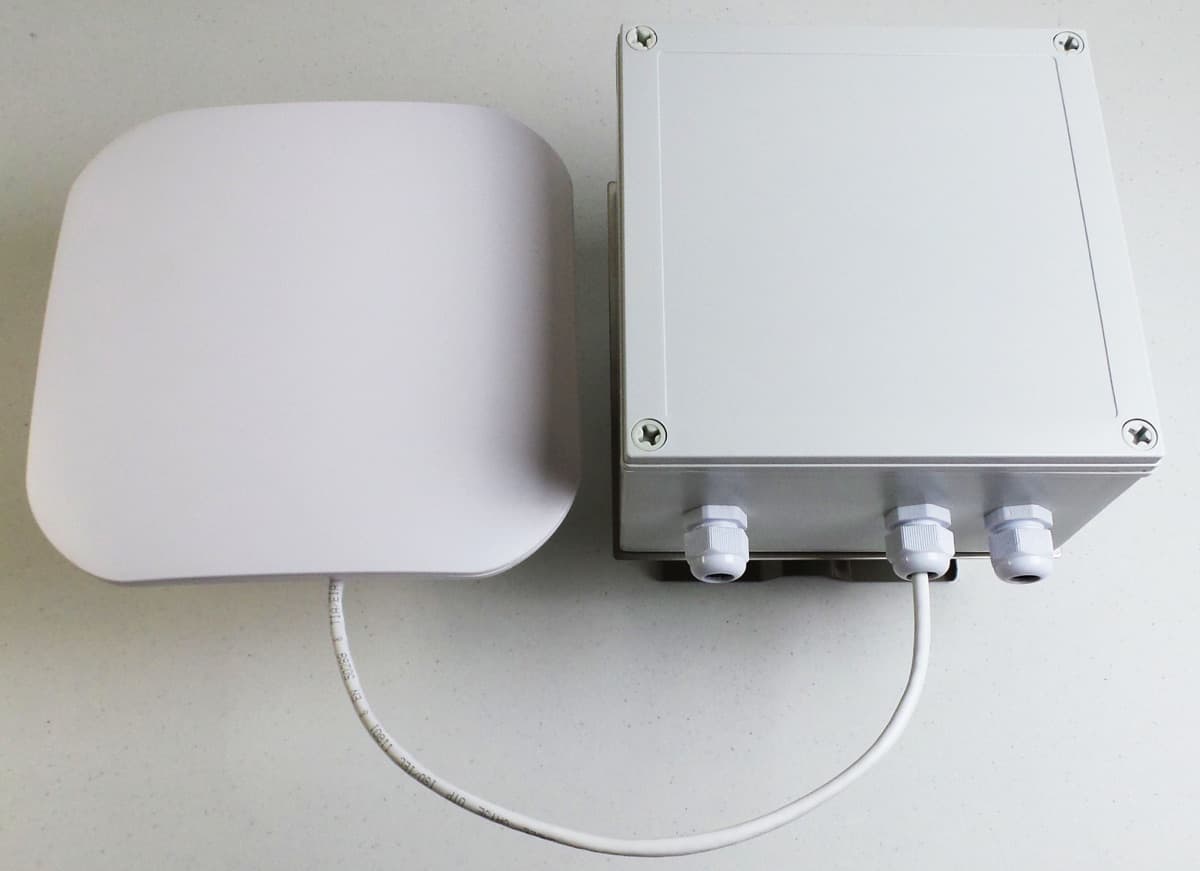
The wireless video transmitter and receiver look the same. Each consists of the two parts that you see above: a weatherproof encoder / decoder box and a wireless antenna.
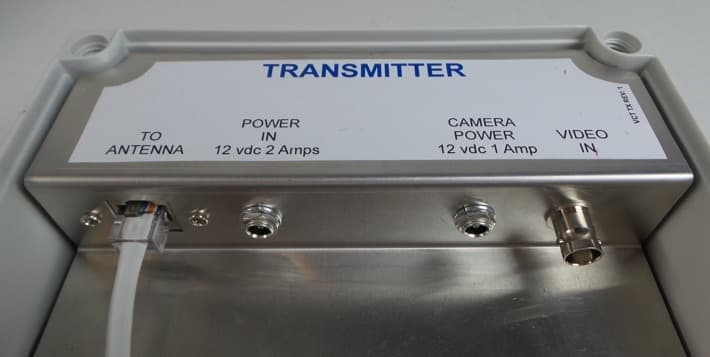
When you open the front cover of the transmitter and receiver boxes, you will see that they are clearly labeled. The transmitter connects to the antenna that it is paired with using the CAT5 cable the is included. A 12V DC 2 Amp power supply connects to the power input of the transmitter. This supplies power to the antenna and camera. This network connection uses PoE to supply power to the Antenna. RG59 Siamese cable is used to connect the BNC video output and power output to the inputs of the camera. Pre-made Siamese camera cables can also be used.
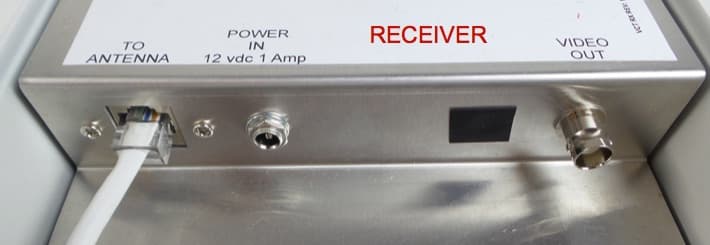
This is what the inside of the video receiver box looks like. The 12V DC 1 Amp power supply that is included is used to power the receiver. This BNC video output connects to an AHD video compatible DVR. These pre-cut RG59 jumper cables can be used to connect the BNC output of the receiver to a DVR. Installers can also custom cut cable to length from a spool of RG59 cable.
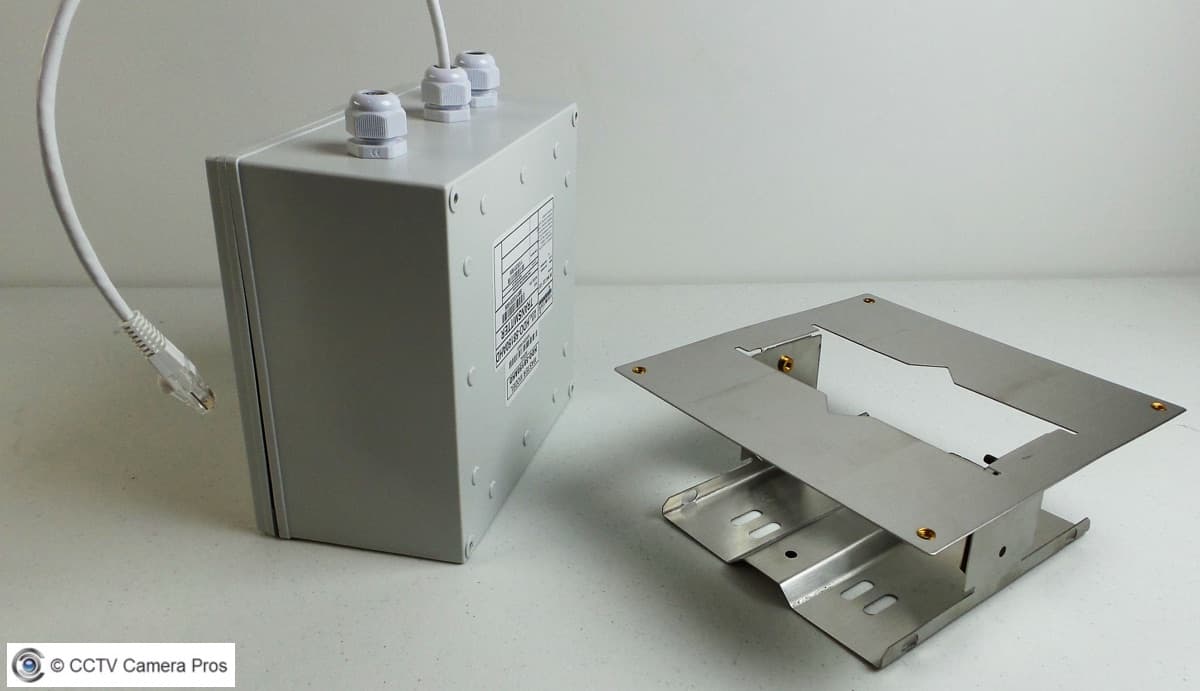
The transmitter and receiver boxes include a metal mount that works perfect for elevator installations. The transmitter / encoder box mounts to the underside of the elevator cabin. The receiver / decoder box mounts at the elevator shaft base (directly below the cabin).
Wireless Antenna
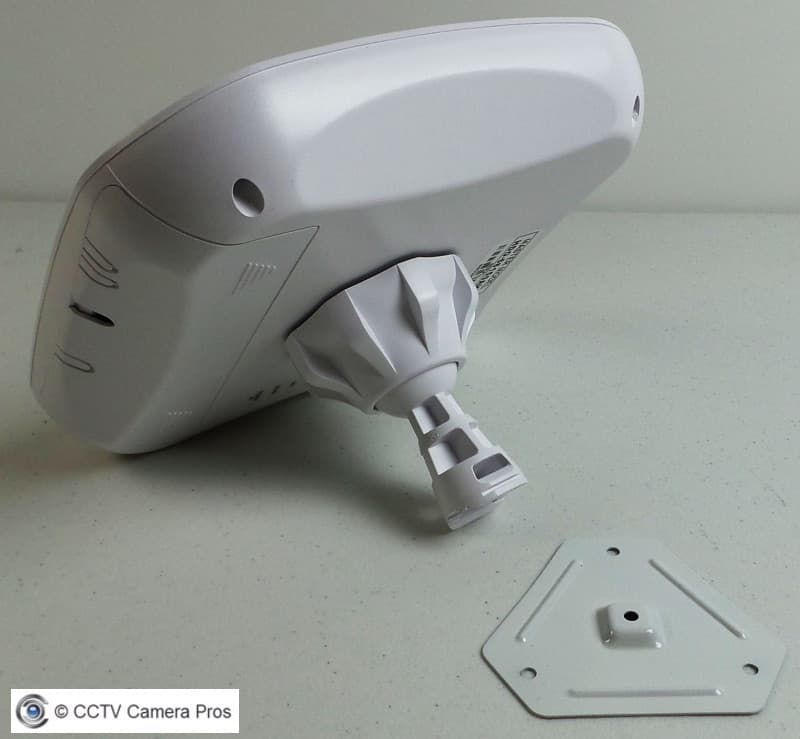
Here is a close-up of the wireless antenna and installation mount plate. The transmitter antenna and receiver antenna look exactly the same. The transmitter mounts on the underside of the elevator cabin and the receiver mounts at the bottom of the elevator shaft. The antennas should be aligned as directly as possible for the best possible wireless bridge connection.
The dip switches on the antennas are used specify which antenna is the transmitter and which is the receiver. The dips switches are also used to specify the WIFI frequency to use for the wireless bridge. The frequency setting must match on both antennas.
When this system is powered up by plugging in the two power supplies, the transmitter and receiver automatically connect and form the wireless CCTV bridge. You will see live video on your DVR right after the WIFI connection is made.
Related Articles and Products
Have Questions / Need Help?
Setting up a wireless elevator camera system is not the easiest type of security installation. However it is not terribly difficult either when you use the right equipment. If you have any questions related to video surveillance systems, please contact me by email here.


