
IP Camera Timed Snapshot Images Save to Micro SD Card Setup
Viewtron IP cameras support the ability to take snapshot images automatically at a set interval and save the images to a local micro SD card. This is a handy feature if you later want to compile all of the images into a time-lapse video. Watch this video or follow the instructions below to see how easy it is to setup automatic timed snapshots on your Viewtron IP camera.
Please note that compiling a time lapse video is not a function of the IP camera and must be done by a separate program. The Viewtron IP camera’s user interface makes it very easy to download individual pictures from the security camera in the mean time.
Insert Micro SD Card into IP Camera
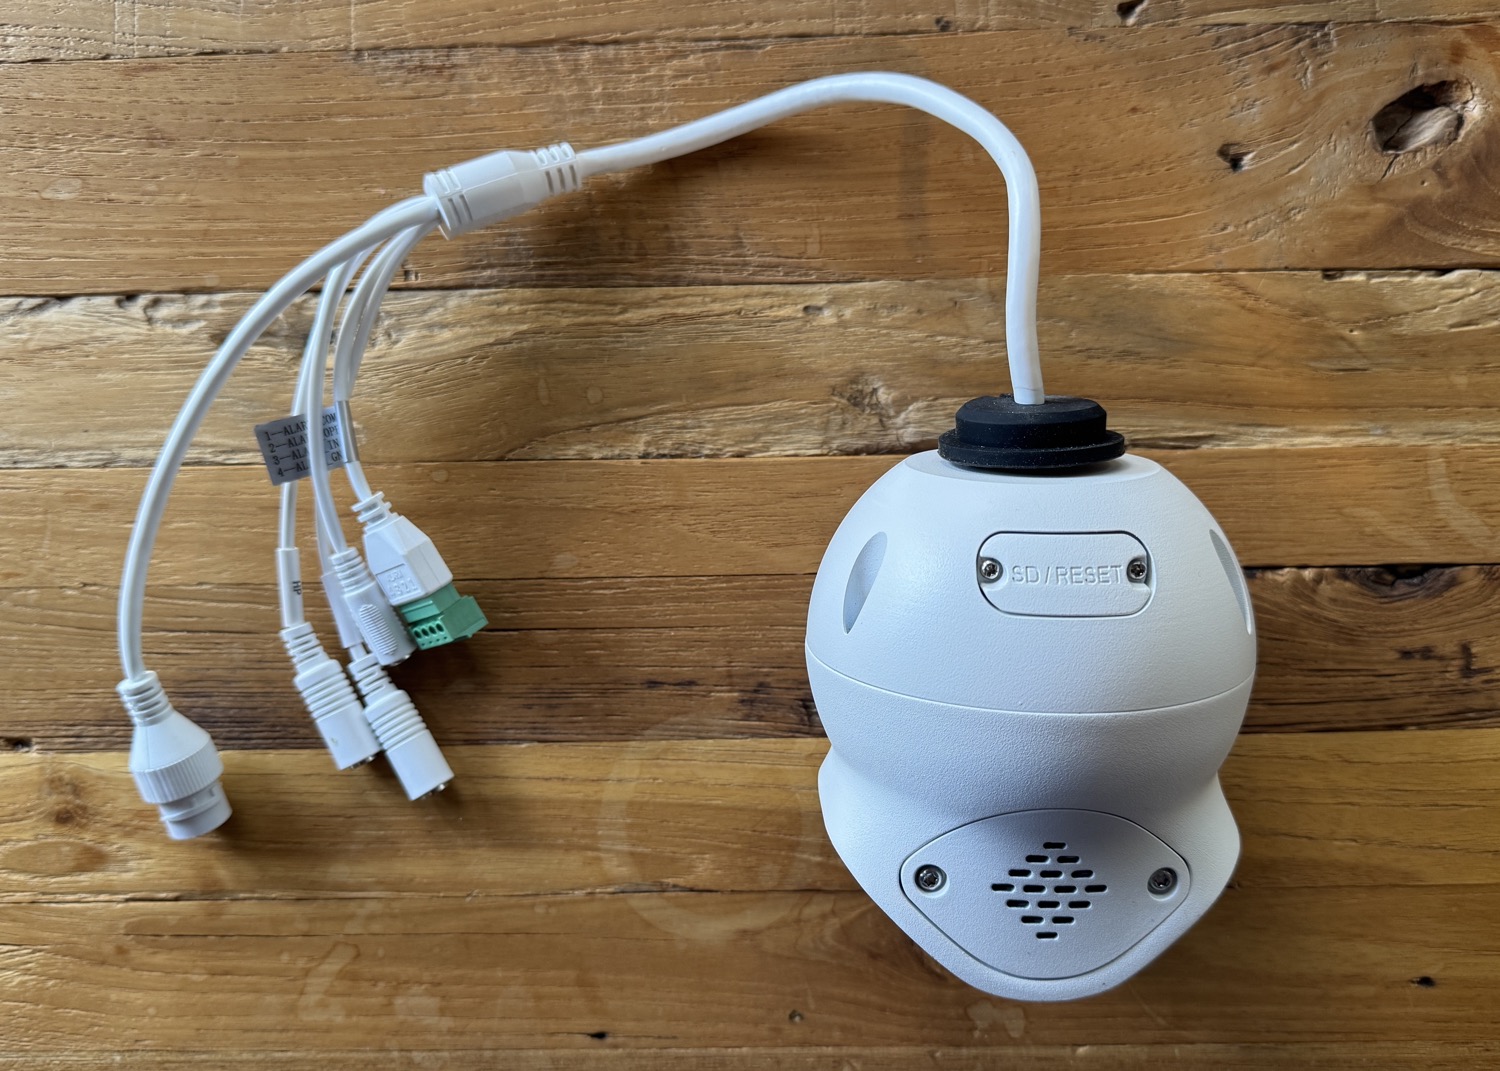
All of our Viewtron IP cameras have a micro SD card slot. You can see the enclosed compartment where the SD card goes on the back of the Viewtron 180 degree camera that I am using for my project. **Please note that micro SD cards are NOT included with our Viewtron IP cameras. You must purchase these separately. At the time of this writing, some of our Viewtron IP camera models support up to 128GB cards and some newer models support up to 256GB cards. I am using a 128GB card. I can take a snapshot every 10 minutes and have enough storage for several years worth of images.
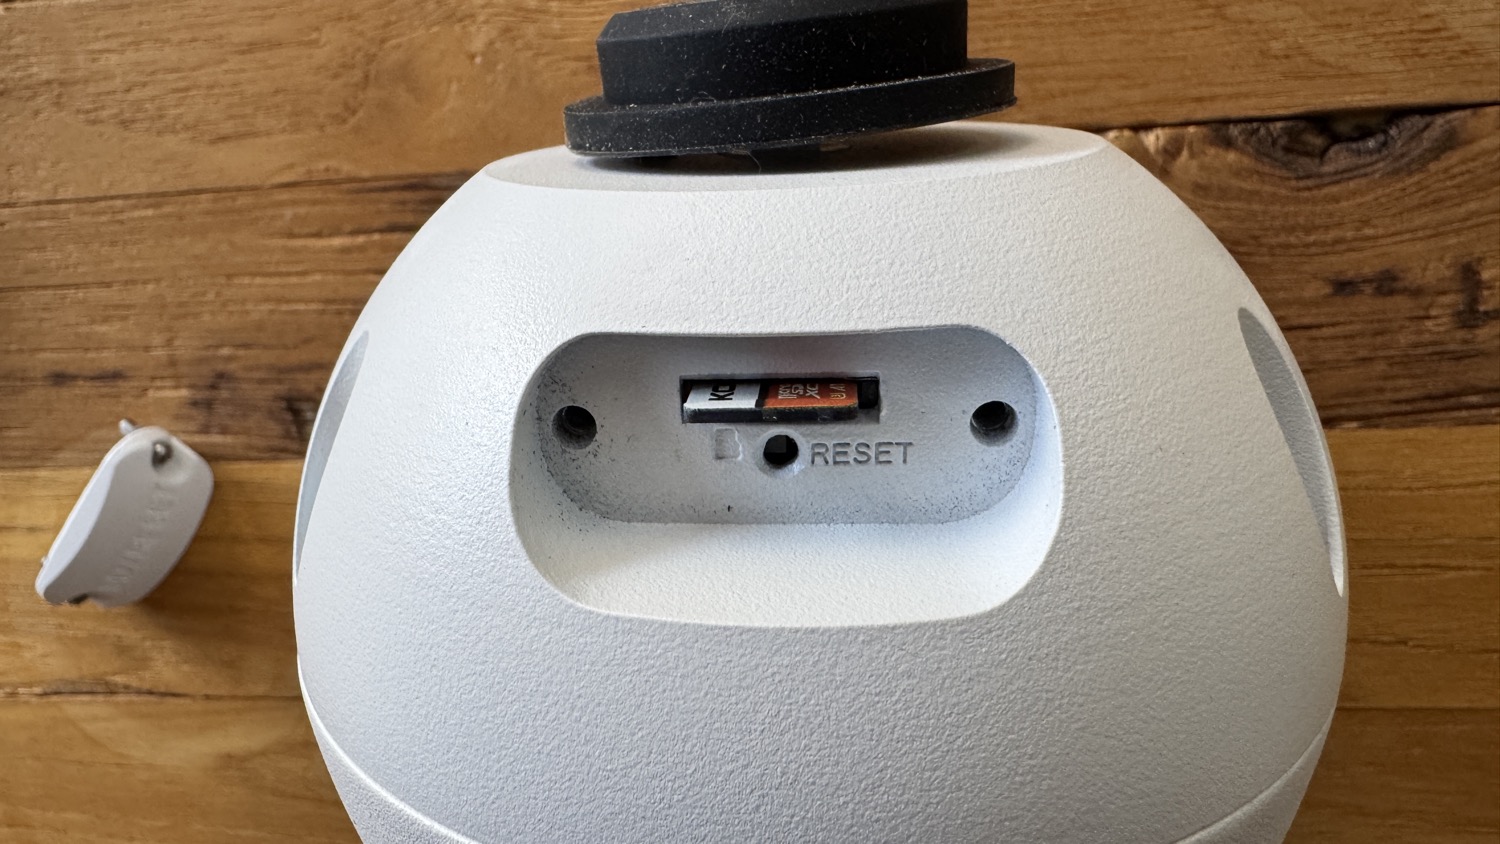
Here is the compartment opened with the micro SD card inserted into the security camera. Be sure to securely re-attach this cover when you are done.
Option 1: Connect IP Camera to Viewtron NVR
My IP camera is one of many cameras that are part of my home security camera system in Colorado. I have all of my cameras connected to my Viewtron NVR. They are hard wired to the PoE ports on the back of my Viewtron NVR.
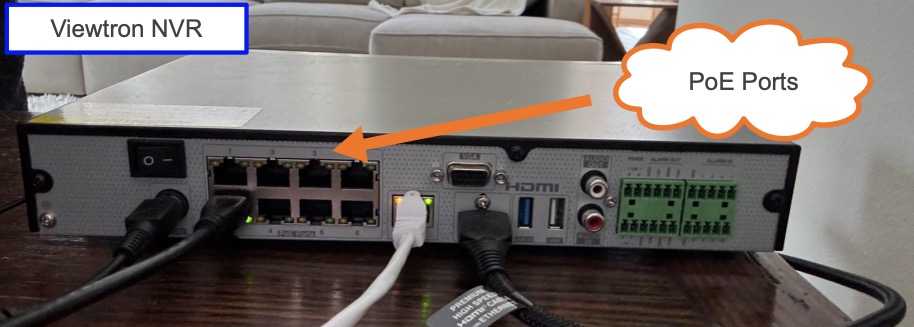
This allows me to have video surveillance recording continuously and when motion is detected on all of my cameras (centrally recorded on the NVR). The timed snapshot images function will be happening in addition to this, and that will take place directly on the IP camera (independently of the NVR).
Option 2: Connect IP Camera to Network
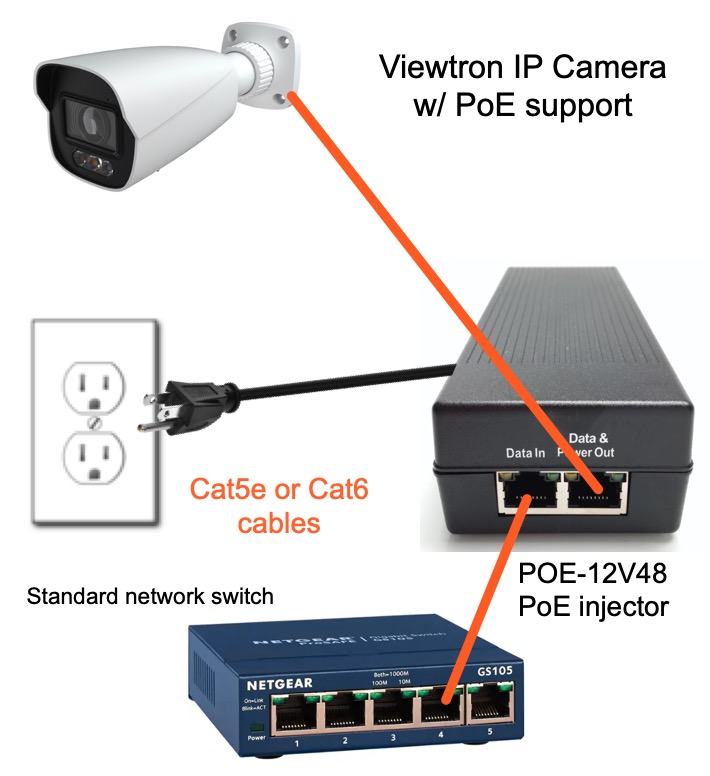
If you are not using a Viewtron NVR, you can connect your IP camera directly to your office or home network with a PoE injector or PoE switch. If you plan on also recording video surveillance footage and / or plan on using more than one IP camera, CCTV Camera Pros highly recommends using a Viewtron IP camera NVR (option 1 above).
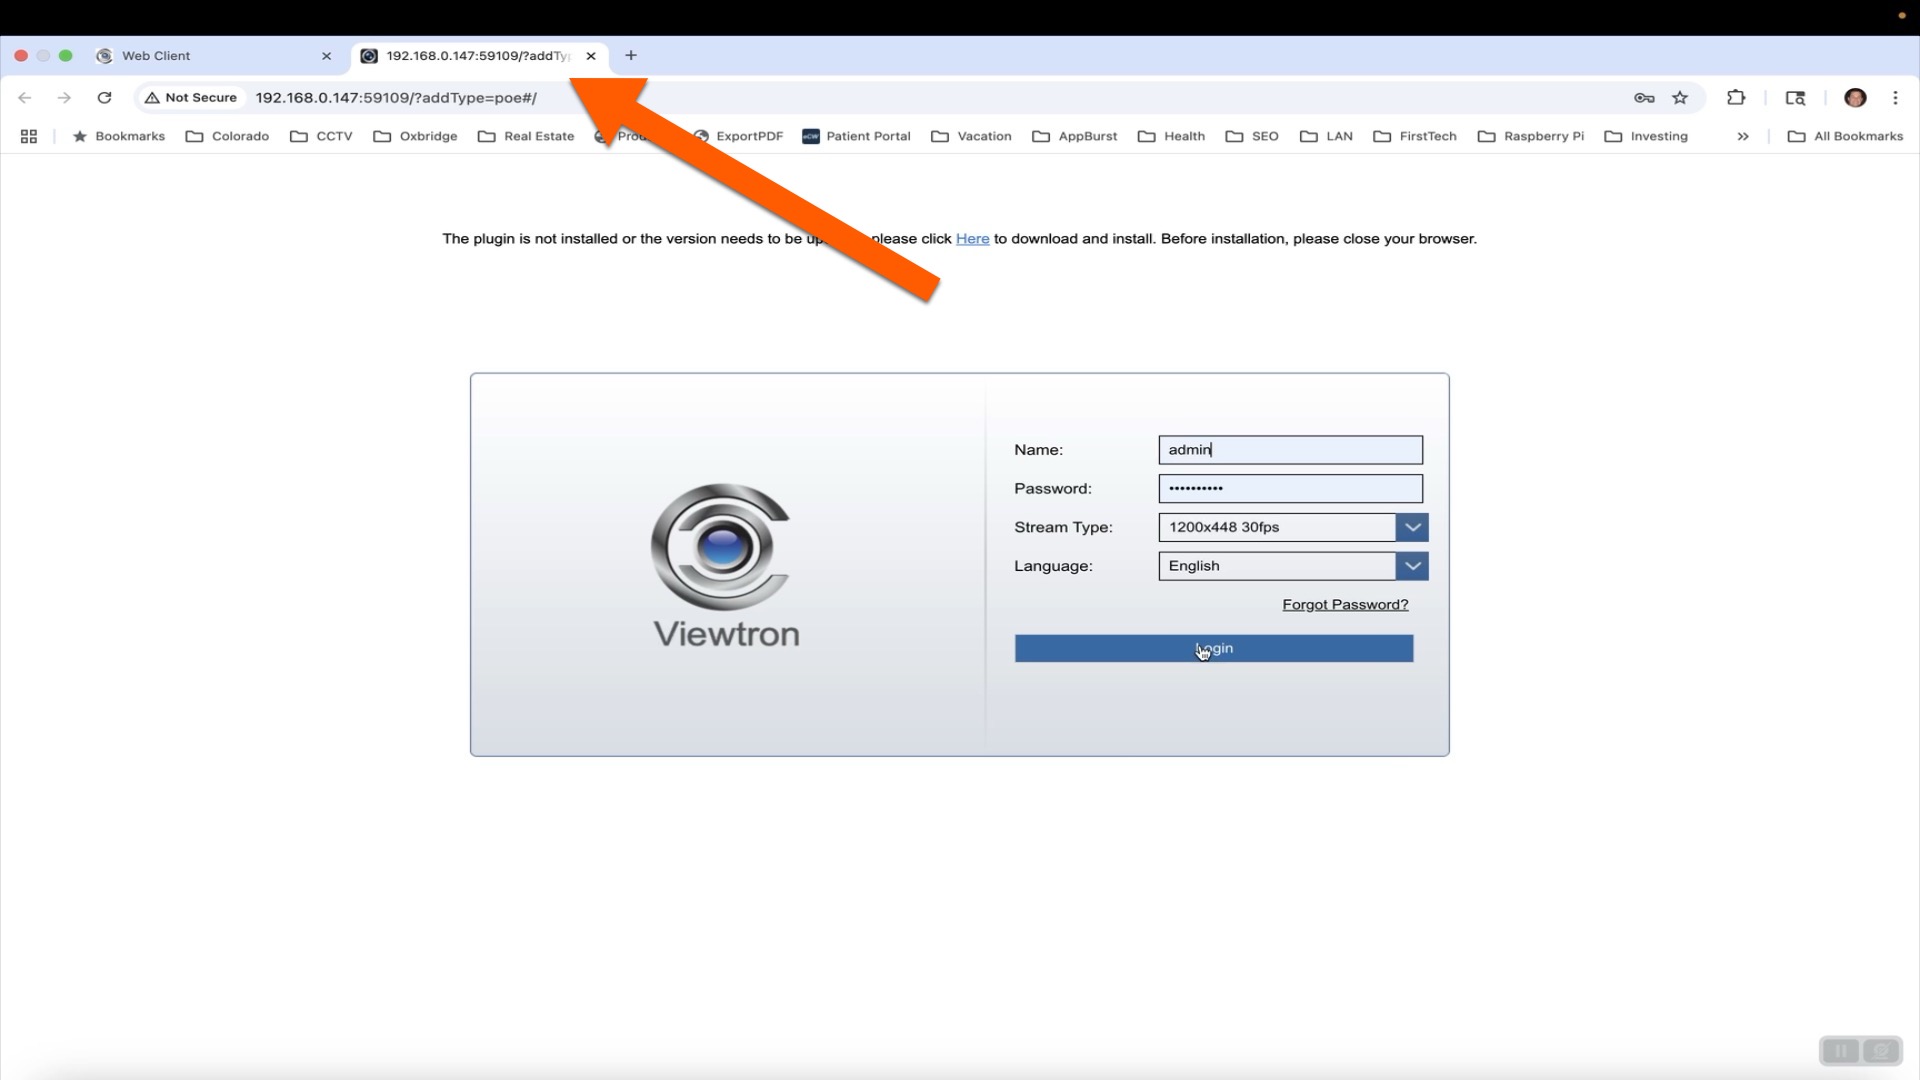
Login to NVR via Web Browser
If you have your Viewtron IP camera connected to a Viewtron NVR, log in to your NVR from a web browser. Please note that the PC you use must be on the same local network at the Viewtron NVR. If you do not know the local IP address of your NVR, you can get it from the monitor connected to your NVR. Select Settings > Network. If your IP camera is not connected to a Viewtron NVR, then log into it directly from a web browser and you can skip ahead to the section named “IP Camera Firmware Screen”.
NVR Functional Panel
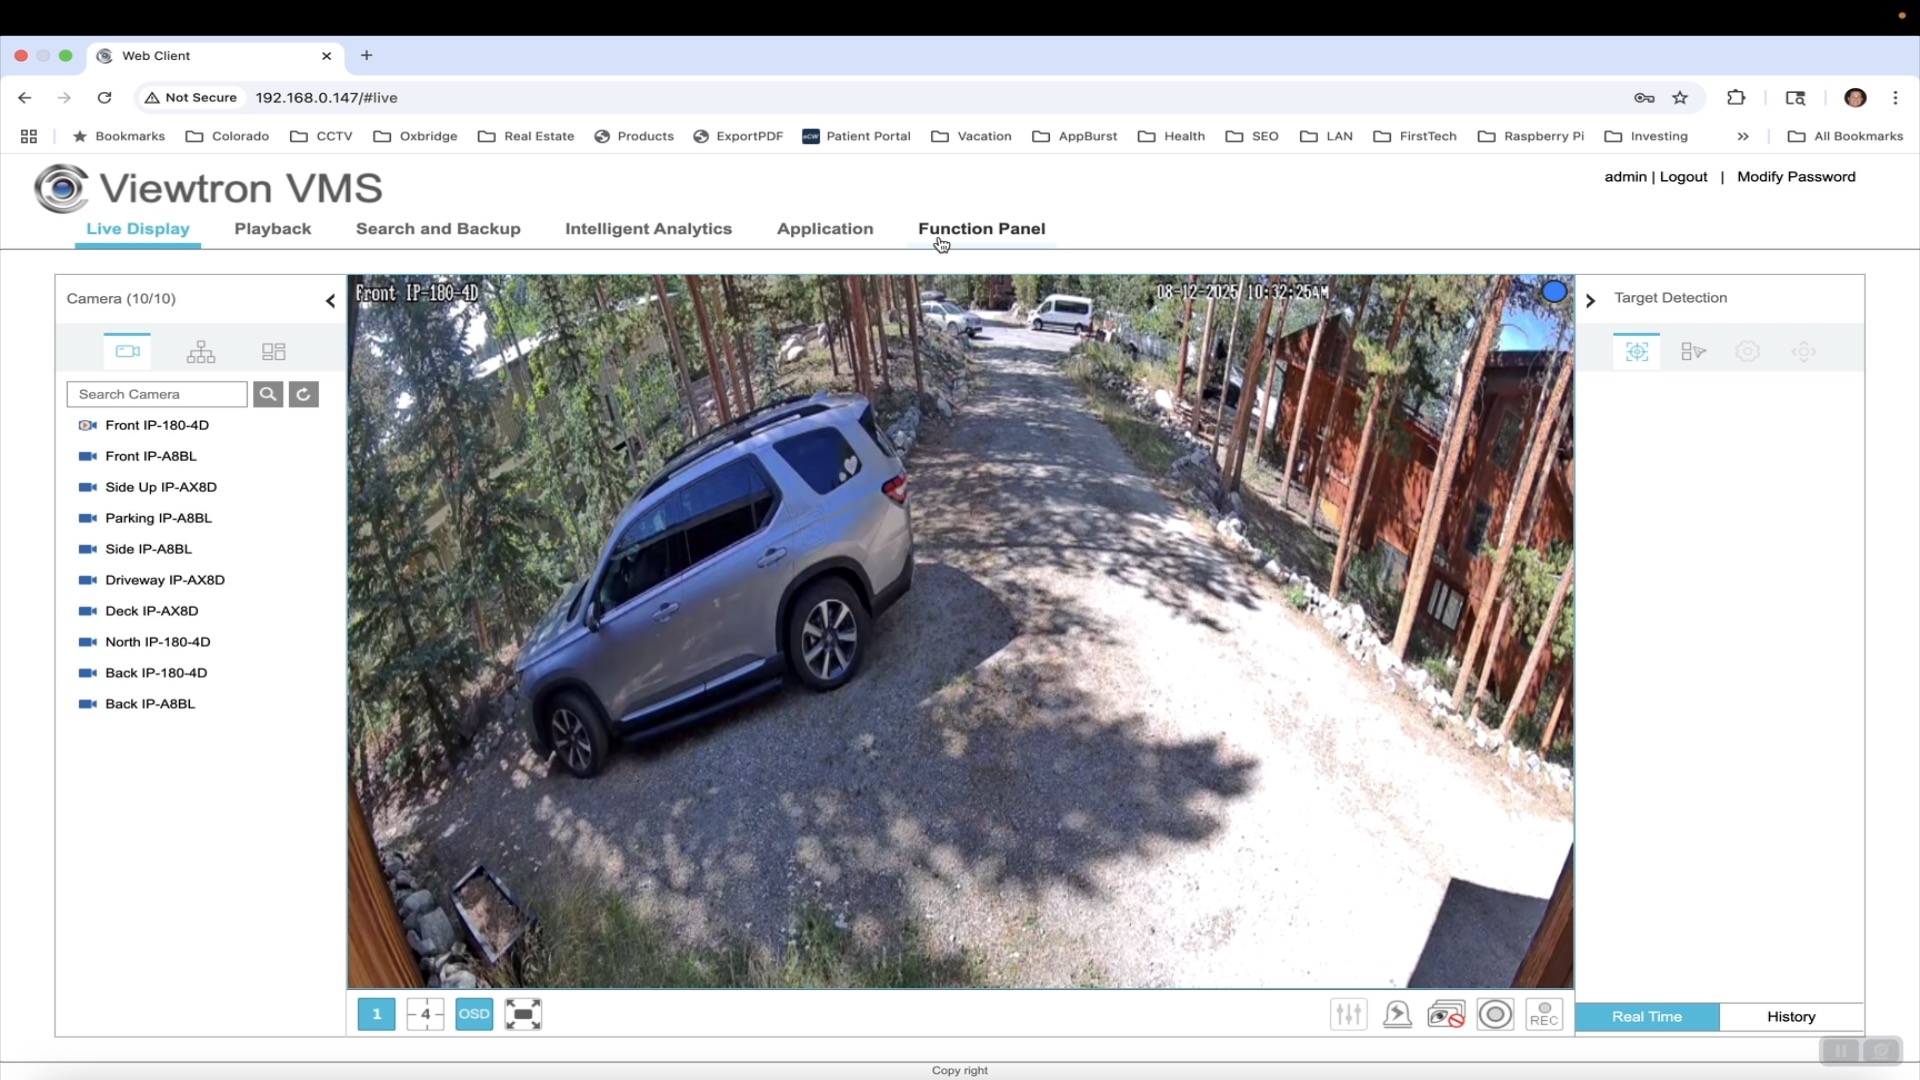
Once you are logged into the Viewtron NVR from the web browser, click on the Functional Panel link.
Camera Settings
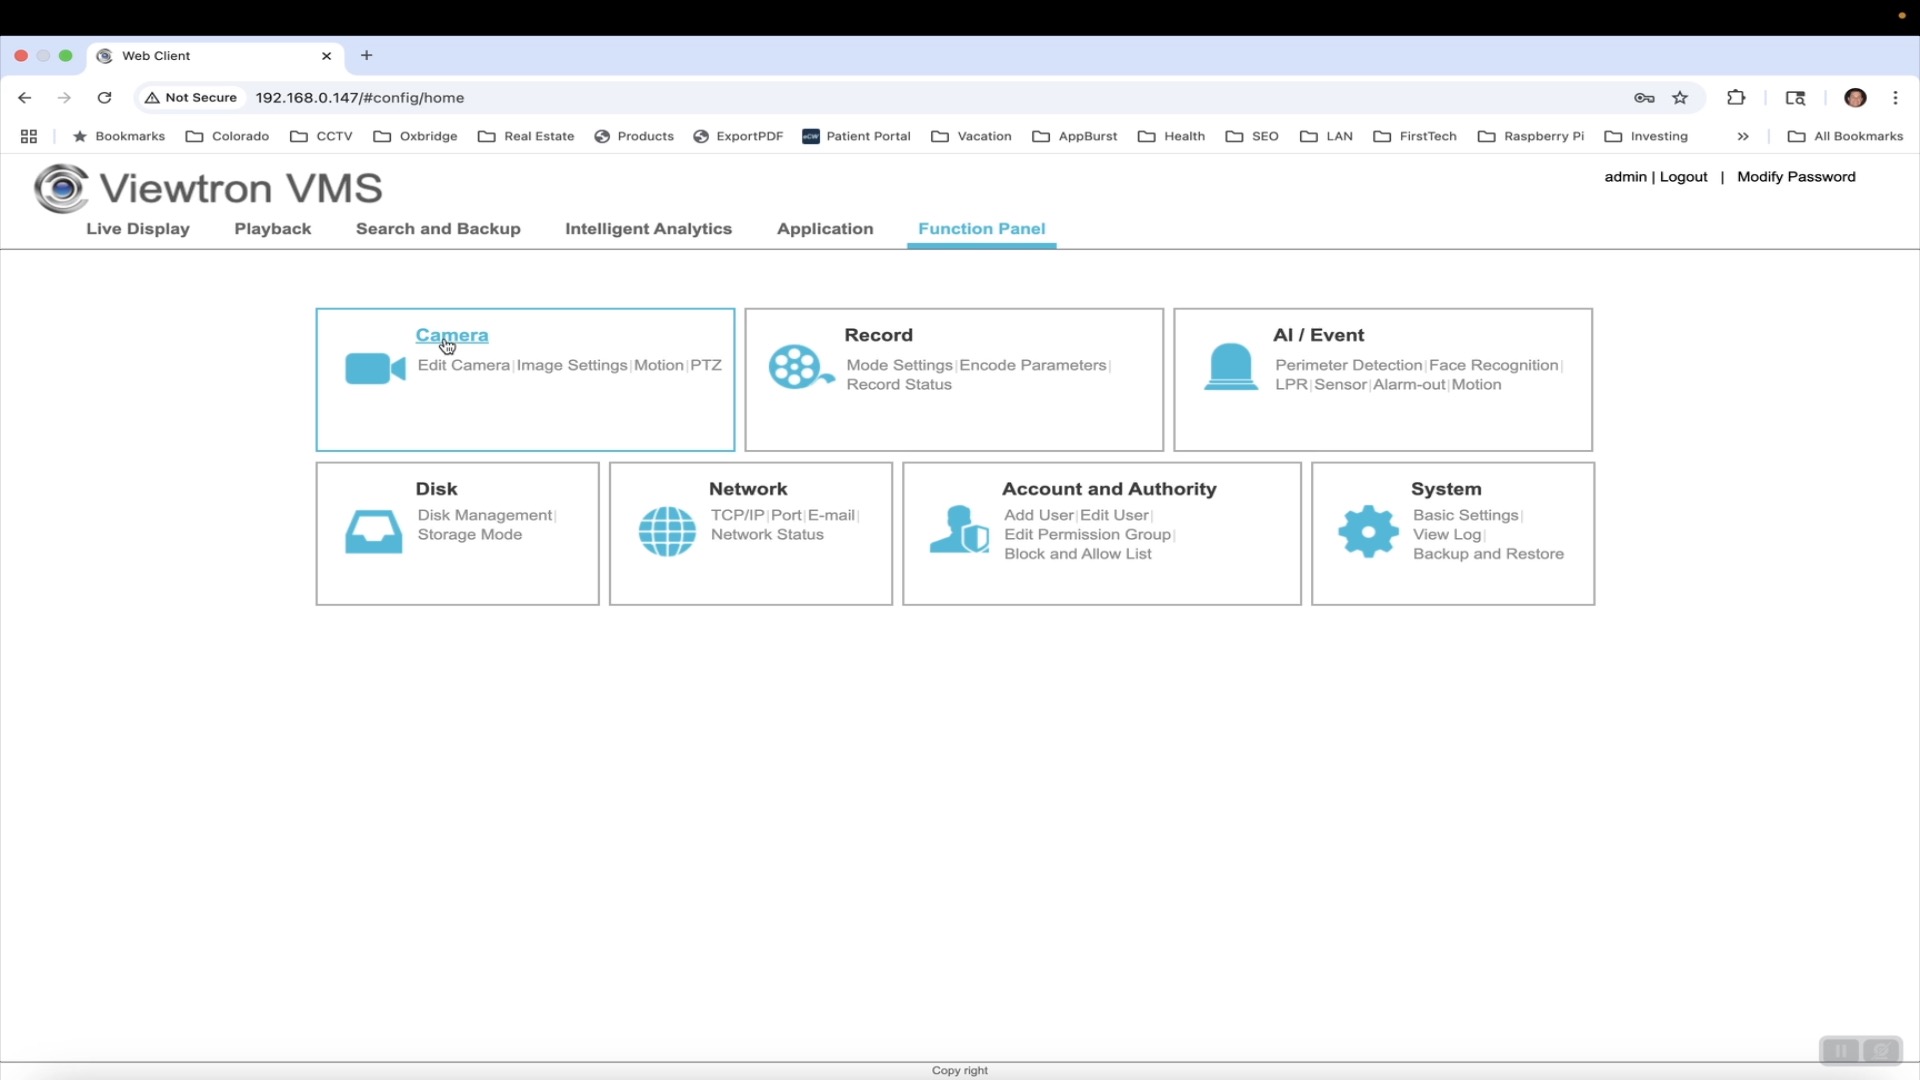
On the NVR’s Functional Panel, click on the Camera link.
IP Camera Firmware Settings
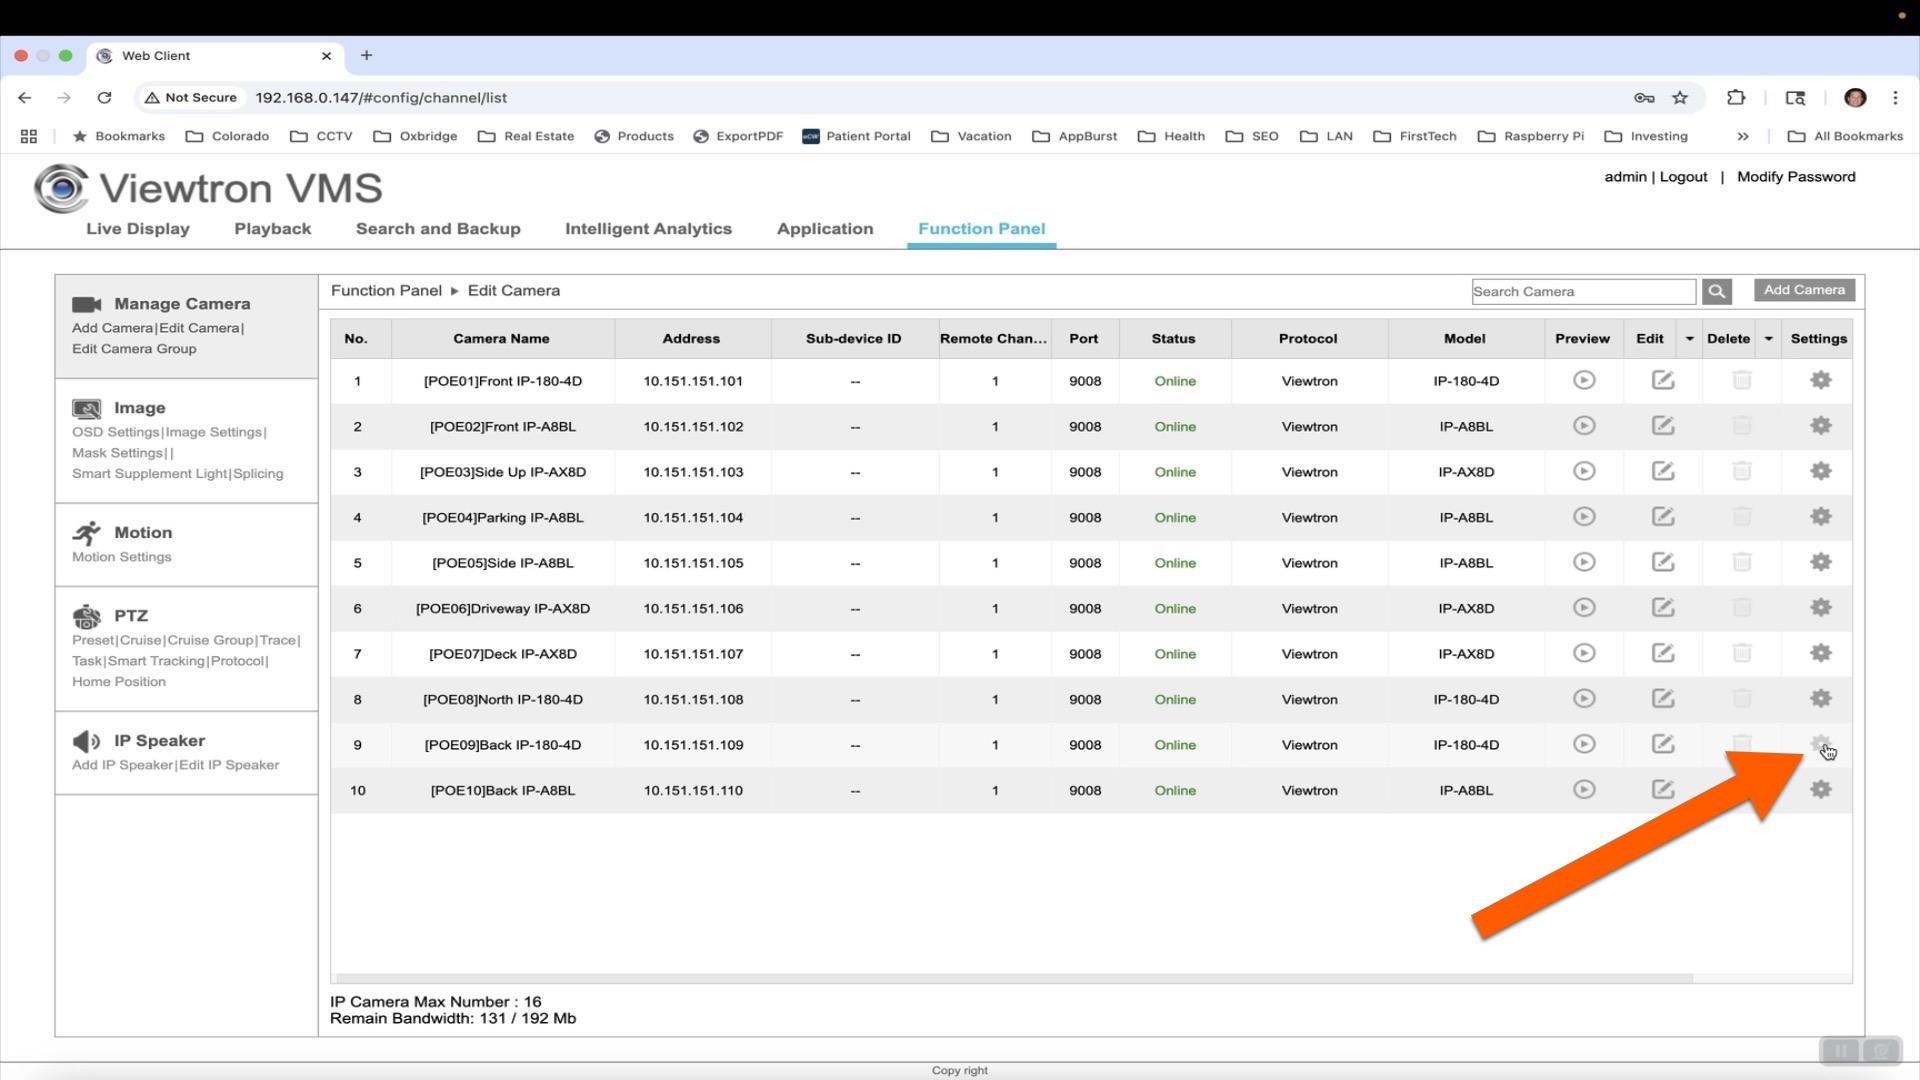
On the camera settings screen, there is a gear icon for each IP camera. These gear icon links open up a new web browser tab and takes you to the firmware for each IP camera.
IP Camera Firmware Screen
Here is the new browser tab that is opened to the login screen of the IP camera. If your IP camera is connected directly to your network and you are NOT using an NVR, you would start the setup here.
IP Camera Configuration
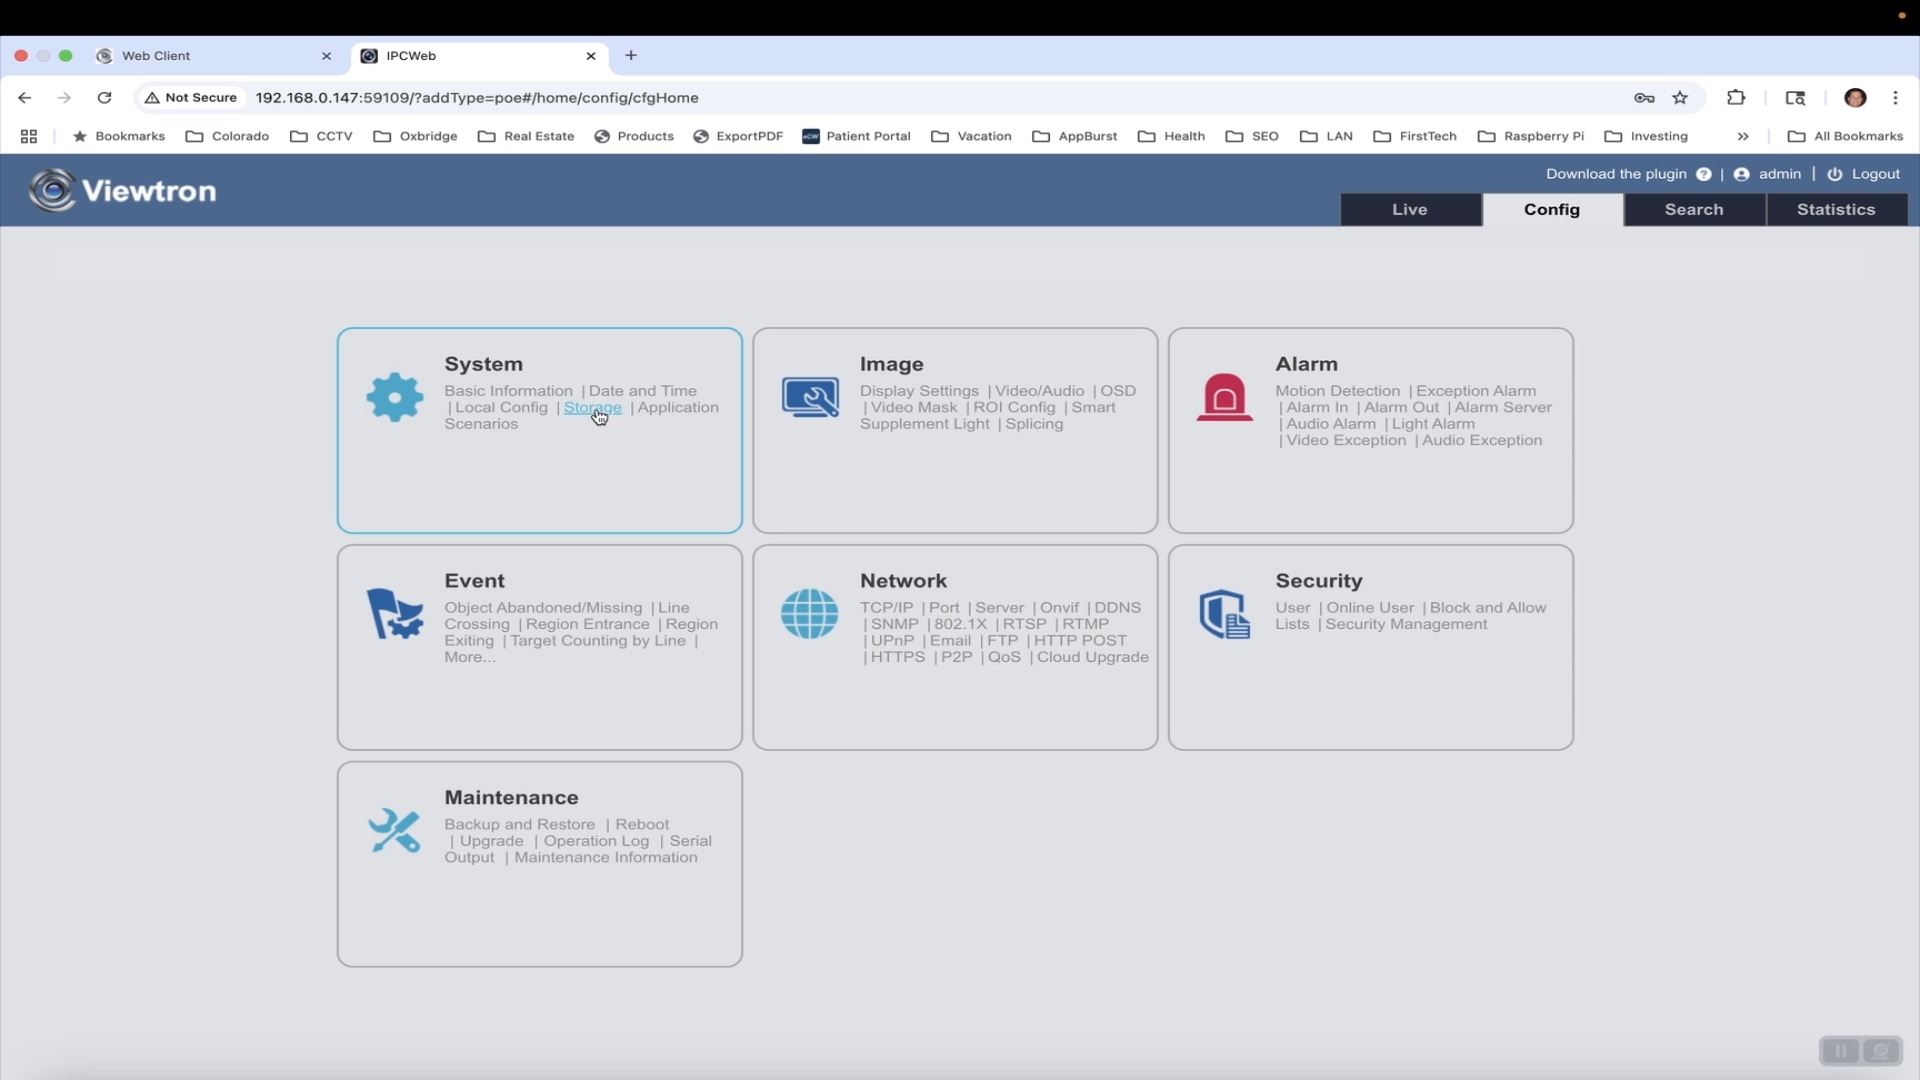
Once you are logged into your IP camera, click on the Config tab in the upper right. Then, click on the Storage link in the System section.
Format Micro SD Card and Set the Snapshot Quota
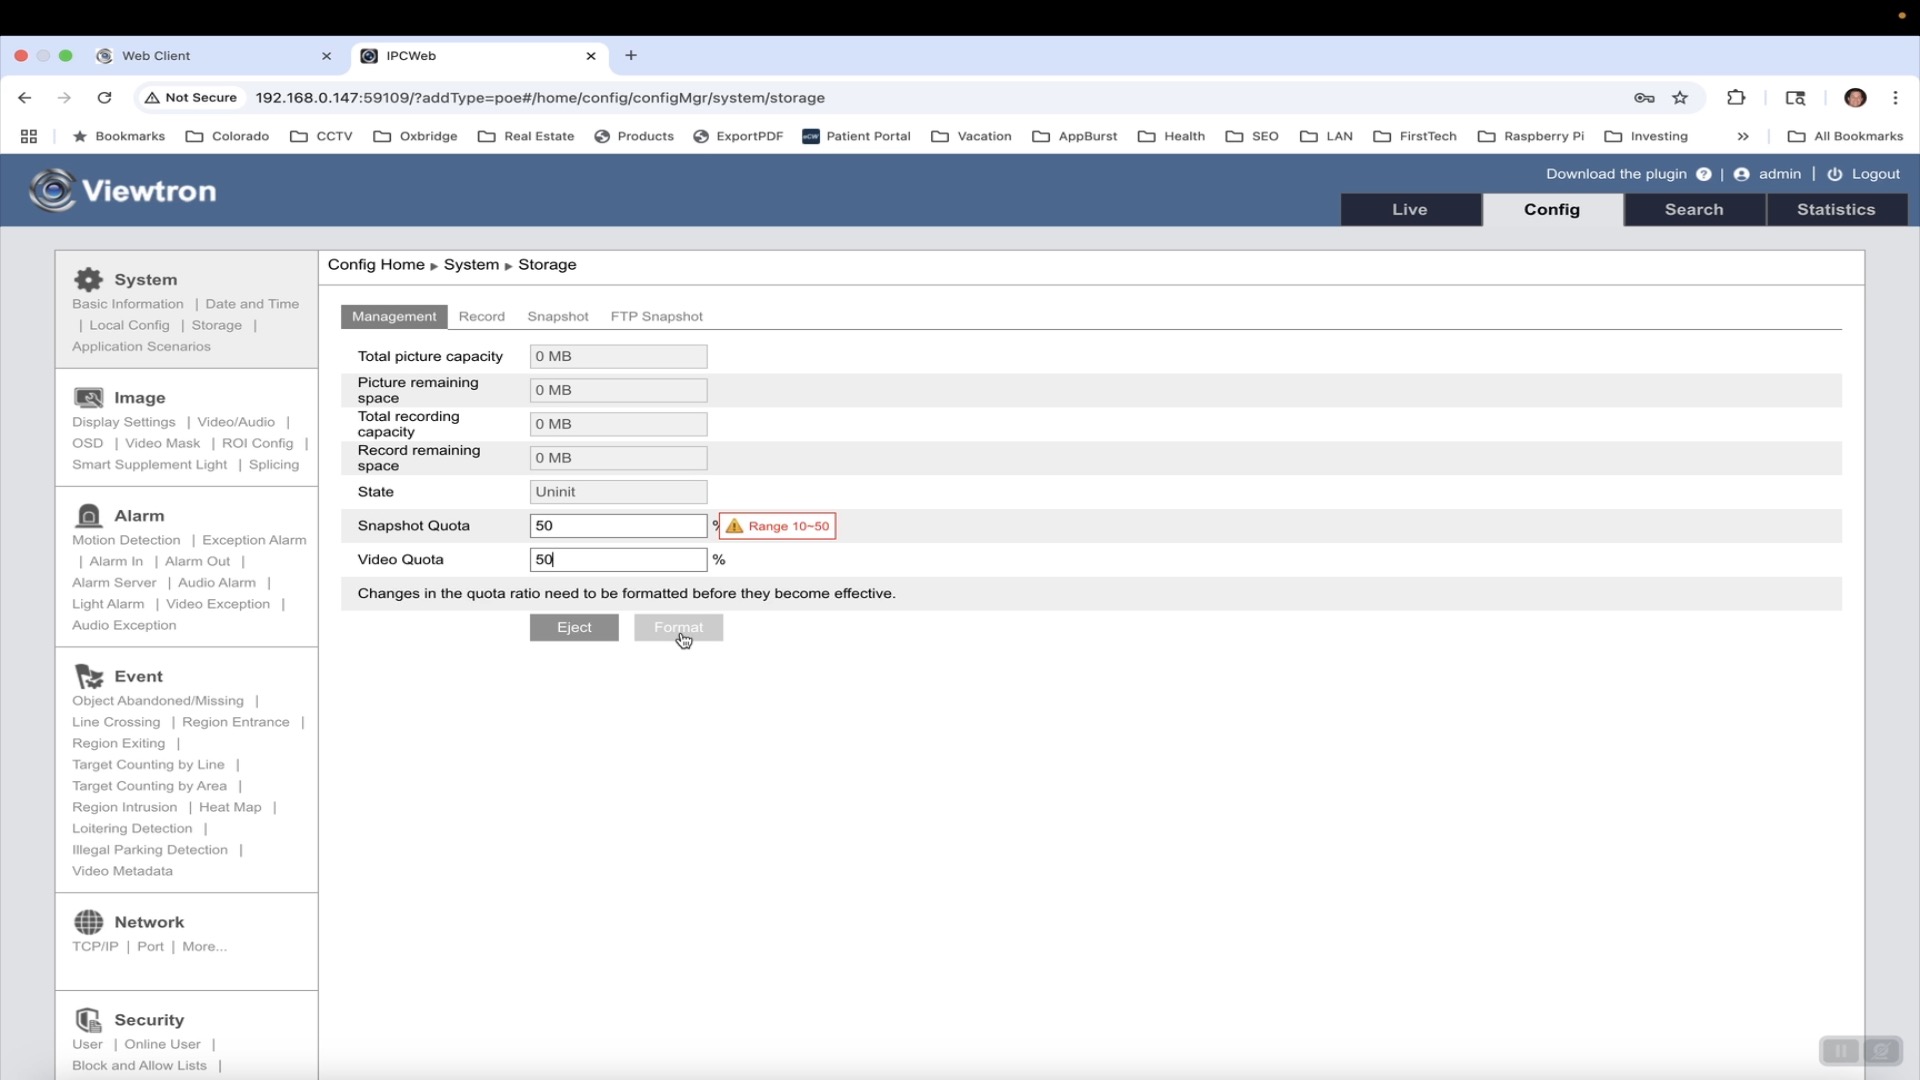
On the storage screen, set the Video Quota and Snapshot Quota to 50% each. Then, click on the format button to format the micro SD card.
Setup Snapshot Image Timing Interval
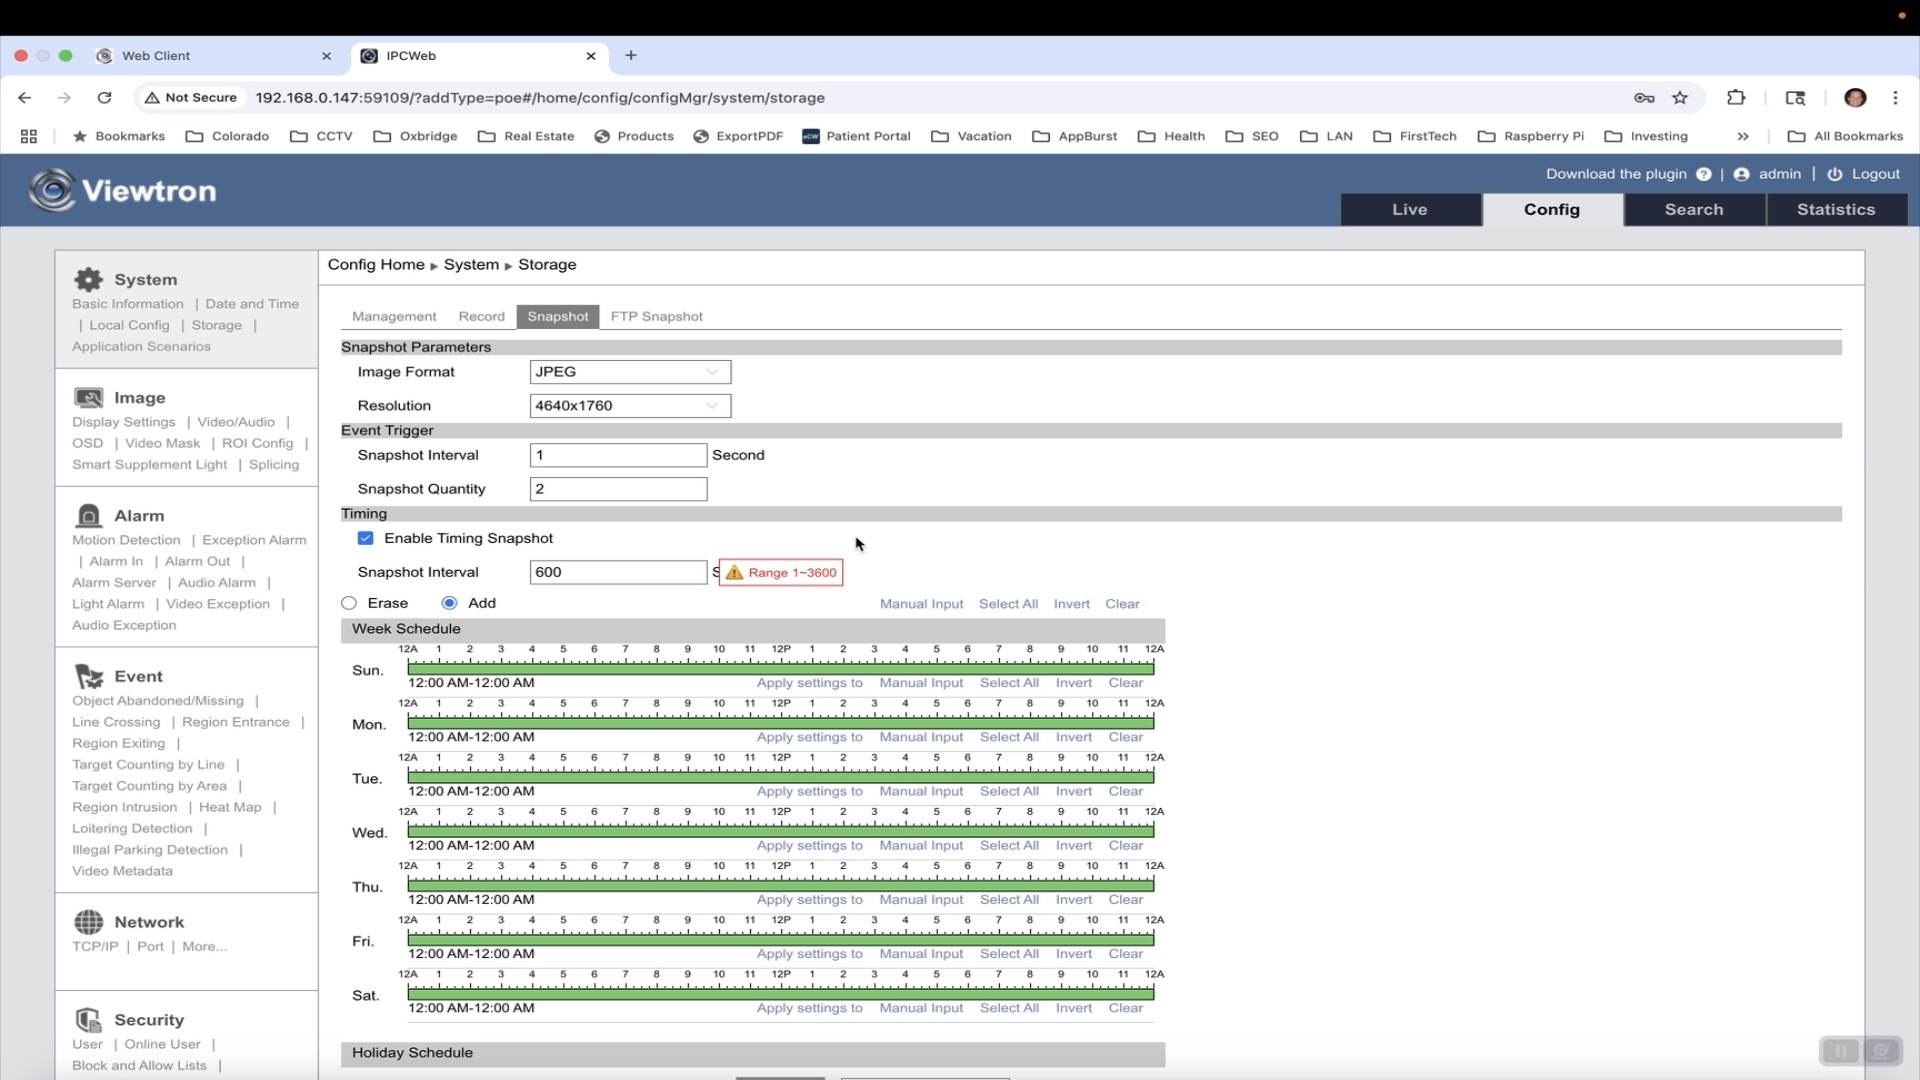
Next, click on the Snapshot link. Check the Enable Timing Snapshot checkbox. Enter the Snapshot Interval in seconds. Click the Save button.
Setup Highest Resolution Snapshot Image
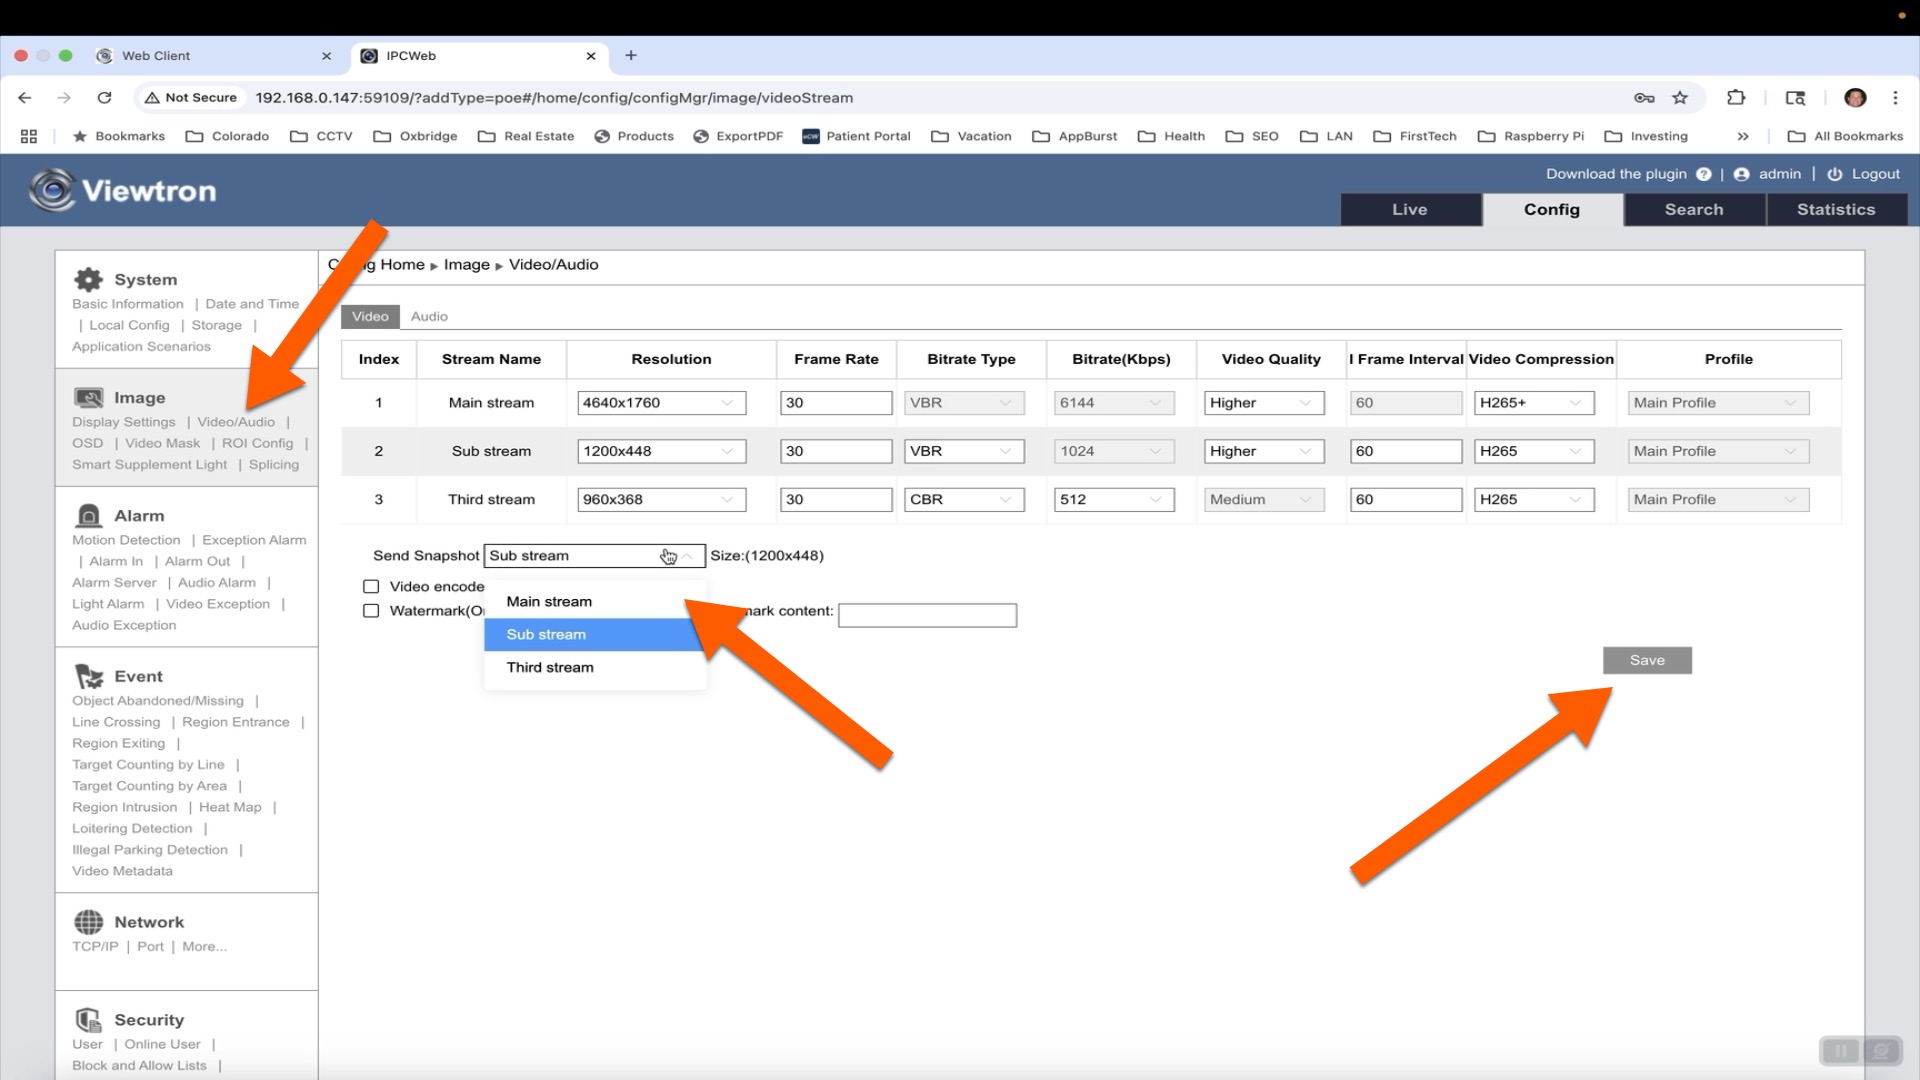
You probably want to capture the highest resolution snapshot images that your Viewtron IP camera is capable of. To enable the highest resolution images, click on the Video / Audio link under Image on the left. Then, select Main Stream from the Send Snapshot size dropdown box. Click on the Save button.
Snapshot Image Search and Download
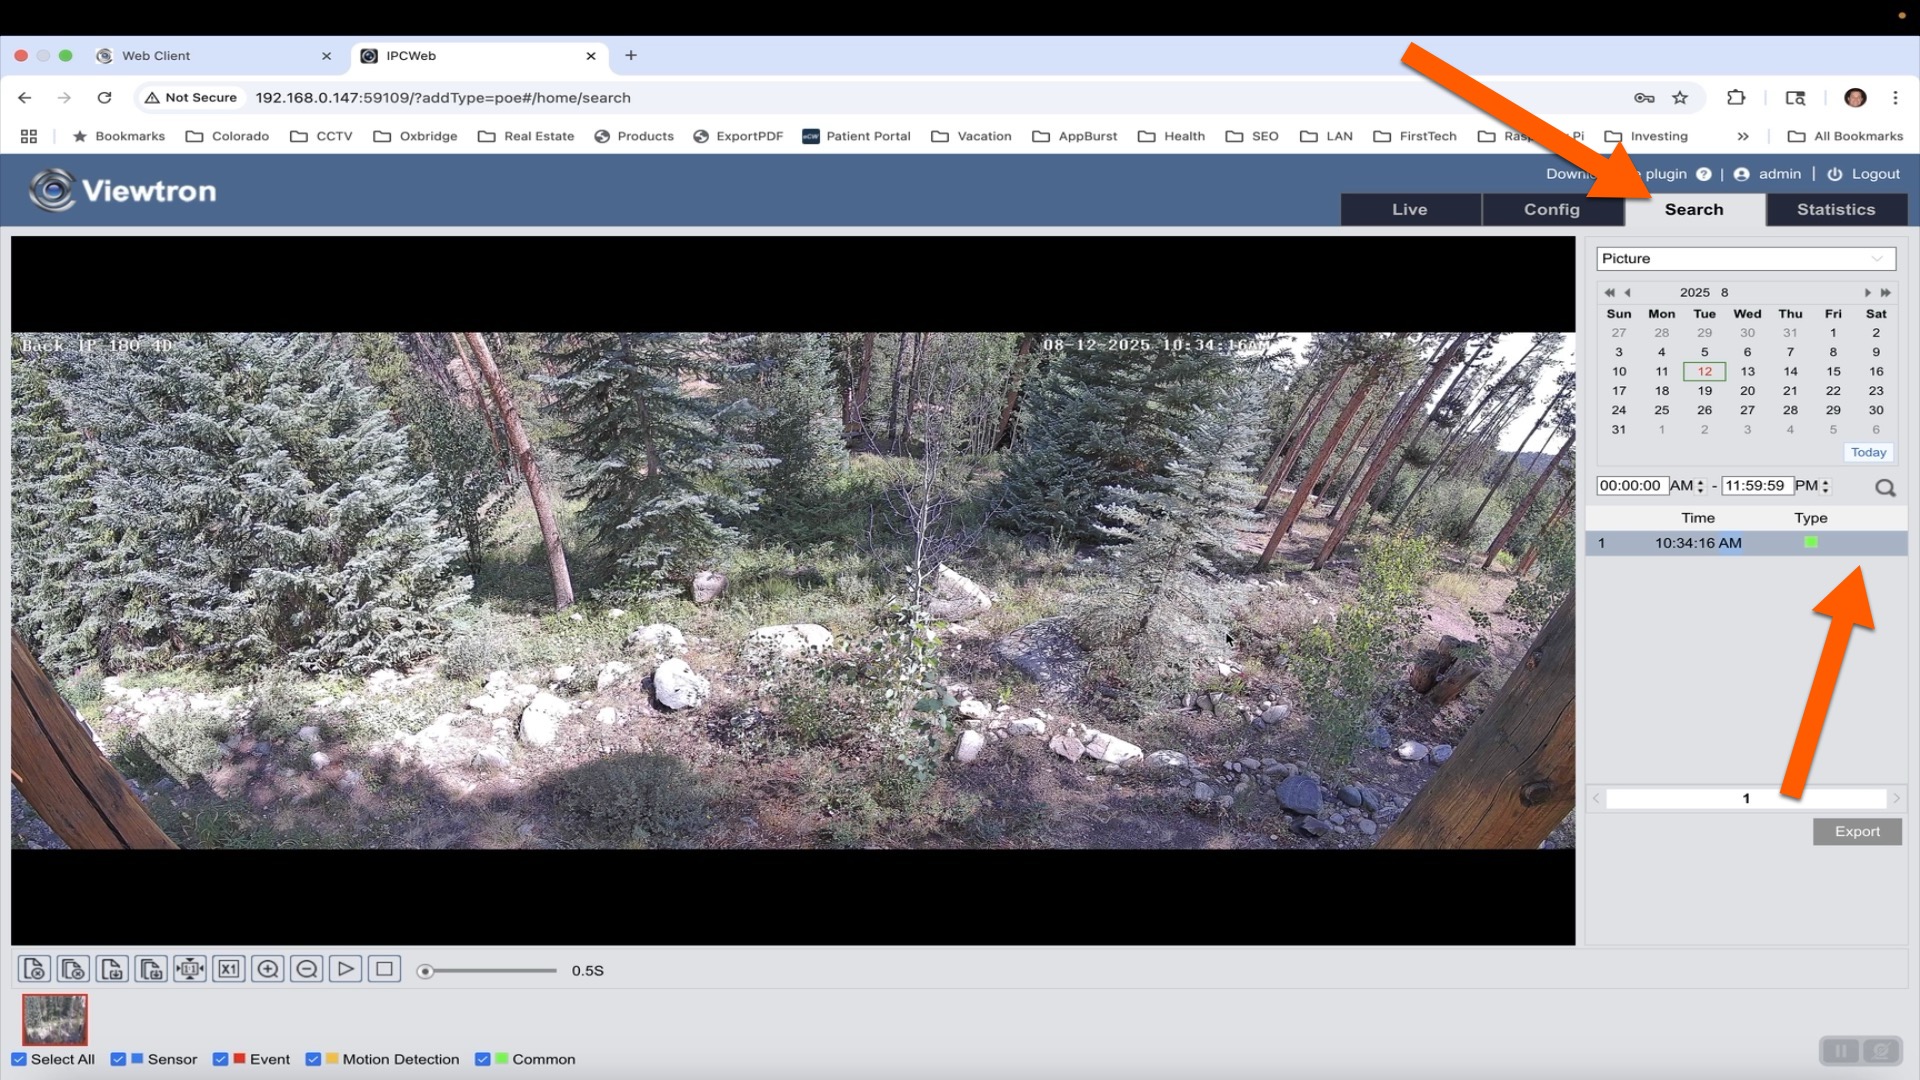
At any time, you can search and download snapshot images from your Viewtron IP camera. Click on the Search tab in the upper right. Then, select the date and time frame that you want to search. Then, click on the magnifying glass search icon. All of the images in that range will be displayed in a list. You can click on any of them to display the image. You can click export to download the image to your PC.
Time Lapse Video Creation from IP Camera Images
I am going to let the timed snapshots run on my IP cameras for a year and then compile a time lapse video to see the change of seasons in my back yard. I will update this post later and document how I make that video when that time comes. Most likely I will write a Python program to do this. If I do, I will open source that program and post it on Github for customers to be able to download and us it.
Viewtron IP Cameras
This article and video is applicable to all Viewtron IP cameras that have a micro SD card slot.
Have Questions / Need Help?
If you have any questions about this article or anything related to security camera systems for home, business, and government, please email me at mike@viewtron.com.
Video Transcript
Hi guys. Mike from CCTV Camera Pros here in this video I’m going to show you how to set up automatic snapshot images on our Viewtron IP cameras. So most of the time our Viewtron IP cameras are just used for continuous or motion detection, motion detected video recording. But in addition to that, you can also set up periodic snapshot images. So you could set up any of our Viewtron IP cameras to save a snapshot image to a Micro SD card that you install directly on the camera. And you can set up the interval anywhere between 1 second and 3600 seconds, which 3600 seconds is one hour. I’m going to set mine up to take a snapshot image every 10 minutes and I’m going to let this run for like months or a year. And eventually I’ll take all those images and probably create a time lapse video to show the change of the seasons back here.
All these leaves are going to be changing here soon and then winter will come and the season change should be pretty amazing to watch. But anyways, I have these connected to a Viewtron NVR. So I have to go through the NVR to get to the firmware of the camera. You could do this without a Viewtron NVR as a standalone IP camera. If you don’t want video recording and you just want the snapshot images, you could just do that. Anyways, let’s go inside, log into the NVR. I’ll show you how to navigate to the camera’s firmware. We’ll format a Micro SD card and then set up the automated snapshot images so later we can create a time lapse video.
So here’s the login screen for the NVR in a web browser and I’m accessing the NVR on my local area network. So I’m going to enter in the user ID and password to log into the Viewtron. And the only reason why I’m doing this is to get to the camera’s firmware because each of these are usually cameras on my system are connected to the NVR directly. So I don’t have an IP address that I can get to them directly on the network. I have to go to the NVR. And I do that by going into these camera settings. And then you’ll see for each of the camera there’s a gear icon for the settings for each camera. What that does is that opens up a new tab in the browser.
And now I’m logging directly into the IP camera using a special port through the NVR from this Point forward. It’s the same as if even if you’re just using one of our IP cameras without the NVR for this snapshot setup. So I’m going to go into the Config tab and then click on Storage underneath the system settings. And the first thing I need to do is I want to set. I want to lower the video quota so I can allocate 50% quota for the snapshot images. And then I’m going to click Format, because this is the first time I insert this Micro SD card into this IP camera. And it only takes a couple seconds here to format that. And when I’m done, I’m going to go into the video audio settings for this camera and change the snapshot images to come from the mainstream, not the substream that will allow us to get the full 4K resolution images because we’ll be pulling them from the main stream.
And while we’re in here, I’ll bump the video quality up to the highest so we get the highest resolution snapshot images. When I’m done, I’m going to go back into that storage section and then click on this snapshot link. And then I’m changing the snapshot quantity too. But that really doesn’t matter for what we’re setting up. What’s more important is you need to enable the timing snapshot and then set your snapshot interval in seconds. I’m going to set mine to 600, which is every 10 minutes, and then click Save. So now the raspy camera is set up to take a snapshot image every 10 minutes. And when you want to retrieve any of the images, you go up to this search tab and select Picture, and then you select the date that you want to query and list all the images for.
We just set this up so this is the only image so far. We’ll double click on that so you can see it. And if I wanted to export this image and save it to disk, I could click Export right here and then browse to a directory where I want to save that image. So these will just start accumulating on this Micro SD card and I can go into this search screen anytime to retrieve them.
Guys, I hope this video has been helpful. As I mentioned earlier, all of our Viewtron IP cameras have a Micro SD card slot. They do not include the Micro SD card. So you have to buy like a 64, 128 or even a 256 gigabyte micro SD card. I used 128 because I calculated it and taken a snapshot image at 4K resolution every 10 minutes. There’s enough storage on one of these 128 gig cards for a few years of snapshot images. So anyways, if you have any questions about any of this, if you want to create if you want to save snapshot images, automate this and later create time lapse, you can email me questions. I could be reached directly at mike@viewtron.com. If you want to learn more about our Viewtron IP cameras.
All of them have this feature built into the firmware. Now you could see all of them at www.viewtron.com. Thank you for watching!


